Monday 29 October 2012

Cream Cheese Icing

This is the recipe I used for the icing on my pumpkin muffins.

Serving Size: Should be enough to frost 12 muffins
Nutritional Information: 38 cals, 1g carb, 3g fat, 1g protein

Prep Time: 5 minutes
Cooking Time: 5 minutes

Your Ingredients:


  • 1/2 cup of plain cream cheese (I used light cream cheese)
  • 1/3 cup of heavy cream
  • 1/4 cup of splenda (or equivalent choice sweetener)
  • 1 teaspoon of vanilla extract


Your Tools:


  • A mixing bowl
  • A hand or stand mixer or food processor 


The Directions:

Step 1 -

Put all your ingredients in the same container and go nuts mixing them together. Then spread your concoction over your muffins or pancakes or something. Eat it with a spoon.


xo,
Jennifer

Pumpkin Muffins


Hi. Today I am bringing you a recipe for actual pumpkin muffins. Yes, these muffins do contain real pumpkin, unlike my pumpkin spice muffins. Though this recipe does start with my base muffin mix, there are a couple noteworthy differences. They are listed below under the ingredients.

Serving Size: 12 medium or 6 large muffins
Nutritional Information(per muffin, for 12 medium muffins) 160 calories, 8g of carbs & 3g of fiber (5g net carbs), 13g of fat, 5g of protein.

Prep Time: 5 minutes
Cooking Time: 20 minutes

Your Ingredients: (in addition to the base mix)

If you do not like flaxmeal or don't have any, you can opt to use 2 cups of almond flour (total) instead. You should be able to get both types of flour from a bulk food store or a health food store.

  • 1 & 1/2 cup ground almond (instead of the 1 & 3/4 listed in the base mix)
  • 1/2 cup of flaxmeal (instead of the coconut flour from the base mix)
  • 1 cup of canned pumpkin (100% pumpkin, NOT a pie filling)
  • 2 tbsp of pumpkin pie spice mix
  • 1/4 cup of crushed almonds/almond slivers or crushed pecans (optional)


Your Tools:

  • A mixing bowl
  • A muffin tin (and paper cupcake cups if you so desire. I like to use them because it keeps my pans from getting ruined)
  • A hand or stand mixer
  • A fork

The Directions:

Step 1 -
Preheat your oven to 350F. Either grease your muffin tin or line the tin with paper cups. 
Step 2 -
Put your butter in a small bowl and microwave it for about 40 seconds. While that's going, mix together all the dry ingredients in a mixing bowl using your fork. 

Step 3 -
After all the dry ingredients are blended, add the wet ingredients and mix with your hand mixer (or stand mixer). Your batter will be thick and maybe chunky (if you included almonds). 

Step 4 -
Fill cups about 1/3 of the way (unless you want bigger muffins, then fill them 1/2 or so) with the batter. An ice cream scoop or cookie scoop works really well for this. 
Step 4 -
If you made 12 medium muffins, bake them for 20 minutes. Take them out, test for doneness (poke with a toothpick). If they are still a little gooey, bake for a minute or two at a time until done. 
Step 5 -
Let the muffins cool in the tin for about 5 minutes, then remove. For those of you not using paper baking cups, the longer you leave your muffin to cool in the tin, the harder it will be to remove it without damaging the muffin.
Leave your muffins out on a cooling rack of some kind until completely cool, and store. Refrigerate for longer life, as there is no sugar to act as a preservative. 
Finished Product


These have a sugar free cream cheese icing on them.

xo,
Jennifer

Friday 26 October 2012

Easy Chocolate Mousse

Alright so it's been hectic as all hell these last couple of weeks. But all this lack of free time is paying off - I got a new job at the school, I got an 88.3% on my Psych midterm exam, and I've been getting 80-90%s on everything else so far.

BUT I have a tiny break before my next midterm, so this weekend I'm going to make a great effort to put up 3 recipes. Today is something super easy. I bring you low-carb chocolate mousse. I would also like to point out that recipe calculators, especially MFP's (which is what I use most often), count sweeteners on a 1:1 ratio (being 1 tsp: 1g carb). I find that this is good and bad - The way I see it, better safe than sorry when it comes to how many carbs you have, so if you're counting a bit high it's better than counting a bit low. But it also gets discouraging when you are trying to cook and bake low-carb. Not all sweeteners are necessarily 1:1. I don't know them all so I won't go into detail. Oh and on a similar note, most heavy creams aren't 1:1 either, but the one I use lists 1 tablespoon as 1 carb. Just an FYI.

Anyway, here you go!

Serving Size: 2 (1/2 cup each) or 4 (1/4 cup each)
Nutritional Information: (based on 4 servings) 127 cals, 6g of carbs and 2g of fiber (4g net carbs), 11g of fat, 1g of protein.

Prep. Time: 5 minutes

Your Ingredients:

  • 1/2 cup of whipping cream
  • choice sweetener to taste (I used 1/4 cup of splenda this time)
  • 3 tablespoons of cocoa, unsweetened
  • 1 teaspoon of vanilla extract
  • cinnamon to taste

P.S. If you need to make more than 4 servings, keep in mind that whatever amount of cream you use will basically double once whipped. Adjust the other ingredients accordingly as well.

Your Tools:

  • A hand or stand mixer & mixing bowl
  • Measuring cups/spoons
  • dessert dishes

The Directions:

I don't have a bunch of pictures for this one because there's not a whole lot to it. This is almost the same way you would make whipped cream (after all, what is chocolate mousse anyway?)

Step 1 -
In your mixing bowl, pour in the wet ingredients and mix on a low-medium setting for about 30-45 seconds. 
Step 2 -
While continuing to whip your wet ingredients, steadily add your dry ingredients into the mixture. Adding the ingredients slowly will let it mix better than if you were to just dump the ingredients in all at once.
Once your ingredients are all added, you can increase the speed to medium or medium-high (I always end up at 5 out of 8 on my mixer). If your mixer has a pulse option you can occasionally use that if you wish. Make sure you use a spatula to get around the edges of the bowl so everything is mixed together nicely.
You'll want your mousse to have a thicker consistency than the whipped cream you'd top your pumpkin pie with. I suppose you could call the consistency "stiff". You can test this by turning off your mixer and lifting it out of the mousse. If the mousse slips right off the beaters or doesn't form a little peak in the bowl where you lifted, it is probably not done. If, however, your mousse does peak a little and doesn't fall off the beater, move on to step 3. 
Step 3 -
When I make this for the S.O. and I, don't bother with nice serving dishes. The mousse goes straight into little glass storage containers. If you are having guests over, though, I'd suggest putting these into a nice dessert bowl or even a martini glass. Top the mousse with a pinch of cinnamon or a couple dark chocolate chips and enjoy.
Finished Product


xo, Jennifer

Friday 19 October 2012

[Update] Flaxbread

Hi all.

I've adjusted my flaxbread recipe slightly and wanted to let you all know. It's a minor change and also not necessary. I have started using 2 tablespoons of olive oil instead of 1/4 cup! Subsequently, the bread will also have slightly less calories and fat per slice.

Additionally, you can make the bread slightly fluffier by adding a bit more water and mixing it very, very well.

Enjoy!

xo,
Jennifer

Sunday 14 October 2012

Spaghetti Squash Casserole

Okay gosh. I am swamped with studying and taking care of my household and trying to be an involved student. So I'm surprised this is even being posted. I've actually taken a request for crackers as well which I wasn't able to get around to today... :(! Sorry, pearcington! Soon!

I promised my friend crepes (yummy, I know) that this casserole would be the next thing I post. So here it is.

Spaghetti squash is called such because the meat of the squash naturally splits into strands that resemble pasta, particularly spaghetti (or spaghettini). This is a fantastic choice if you are a low-carber and have a serious craving for pasta. Spaghetti squash is incredibly mild flavoured and goes well with just about any sauce. Thus, it is perfect as a pasta substitute. I personally have used white and red sauces with my squash, as well as having served it with butter and parmesan cheese alone.

This casserole is great on its own but also works nicely as a side (especially if you're having steak... mmm!).

Serving Size: 10ish (I forgot to measure this accurately but we got 10 "scoops" servings)
Nutritional Information: 195 cals, 9g of carbs and 2g of fiber (7g net carbs), 13g of fat, 12g of protein

Prep Time: 25 minutes
Cooking Time: 30 minutes

Your Ingredients: 

this is not my image. thanks google.
  • 1 whole spaghetti squash
  • 3 cups of broccoli 
  • 1 cup of cottage cheese
  • 1/4 cup of parmesan cheese
  • 1 to 1 1/2 cups of cheddar cheese, grated
  • choice seasoning

Your Tools:

  • A 1 1/2 quart casserole dish
  • A cheese grater
  • A cutting board & knife
  • A fork

The Directions:

Step 1 -

Preheat your oven to 350F.

Step 2 -

Cook your spaghetti squash. There are many ways to do this so I will outline a few options:

  1. First, use your fork to poke holes all over the squash, as deep as the fork will allow. Next, either inside a microwaveable dish or not, microwave your squash for 10-15 minutes (I did 12 minutes). If you do not poke holes in your squash it will most likely explode into a really terrible mess in your microwave.
  2. First, use your fork to poke holes all over the squash, as deep as the fork will allow. Next, boil the squash for 20 minutes or so. 
  3. First, cut your squash in half length-wise (this is a pain in the behind!) and scoop out all the seeds and mush from the center. Next, place in a microwaveable dish and microwave for 10-15 minutes.
  4. First, cut your squash in half length-wise (this is a pain in the behind!) and scoop out all the seeds and much from the center. Next, brush the exposed flesh around the open edges with oil and place open-side down on a baking sheet. Bake at 350F for 20 minutes.
For this recipe I microwaved my whole squash poked with so many holes. This method has the fastest cooking time, and the squash is easier to cut after it's been cooked. 
Okay leave your squash to cook and move on!

Step 3 - 
As a filler food I used broccoli, primarily because I had extra that I didn't want to go bad and this was the easiest way to use it at the time. But it was actually delicious. If you really despise broccoli, try cauliflower or uh... spinach? Experiment!
Anyway, go ahead and chop up your broccoli florets like so:


Put the broccoli aside and grate your cheese. By the time you are done these things, the spaghetti squash should also be finished.

Oh p.s.! You can lightly steam your broccoli if you don't want it to be really crunchy in the casserole. I kept mine raw and still enjoyed it.

Step 4 - 
The squash is going to be really fricken' hot no matter how you've cooked it so wear some oven mitts. You will want to slice your squash length-wise and then scoop out all the seeds and mush from the very center. 


Step 5 -
Using your trusty fork, split the squash into strands like so: 

You can do this easily just by scraping with your fork. Put all your squash strands into a bowl for now!


Step 6 - 
Add your chopped broccoli florets, cottage cheese, parmesan cheese, and your choice of seasoning to the squash strands and mix them up.


Step 7 - 
In your casserole dish, start to layer your pasta mixture and cheese (pasta/cheese/pasta/cheese) like so: 

Make sure your final layer is a nice layer of cheese!

Step 8 - 
Bake your casserole in an open dish (no lid) for 25 minutes and then another 5-10 minutes on broil. Once finished, let it cool for a few minutes and enjoy!


Finished Product


I should really get a camera.


xo,
Jennifer

Monday 8 October 2012

Pumpkin Pie

It's Thanksgiving here in Canada, so in the holiday spirit I've made low-carb pumpkin pie! It's not as low-carb as I would like it to be, but compared at about 40-50g of carbs per slice for a 'regular' pumpkin pie, I'll take it! Though there are some ingredients that could be switched/adjusted to make this lower carb - I will list them under ingredients, but I haven't tried the adjusted pie myself.

I would like to stress that although this is a low-carb pie, everything in moderation! (I say, remembering the slice of pie I had with my coffee for breakfast today.)

Serving Size: 1 slice, makes 12 slices
Nutritional Information: (per slice) 154 calories, 11g of carbs & 2 g of fiber (9g net carbs), 13g of fat, 4g of protein.

Prep Time: 10 minutes
Cooking Time: 45 minutes

Your Ingredients:

     Crust:
To make this a little lower carb, you could use ground pecan instead of ground almond. Pecans have more fiber, so your net carbs would be lower, but they are also higher in calories and fat. 
  • 1 cup of almond flour/ground almond
  • 1/4 cup of splenda
  • 4 tablespoons of butter

     Pie Filling:
I am finally starting to regret not having invested in liquid sweeteners so far. If you are using a liquid sweetener, your pie is probably already going to be considerably lower-carb than mine. I am pretty sure I may just go ahead and get me some of that.

Additionally, I used table cream for this recipe but heavy cream would also work. Heavy cream has more calories but is lower carb, so it's a trade-off as well.

  • 1 1/4 cups of pumpkin (I use canned pumpkin, NOT pumpkin pie filling)
  • 2 eggs
  • 2/3 cup of light (table cream) or heavy cream (I used table cream)
  • 1 cup choice sweetener (I am using  powdered splenda)
  • 4 teaspoons of pumpkin pie spice mix (You can get this mix at a bulk food store or look up how to make it yourself)
  • 2 teaspoons of cinnamon (The pumpkin pie spice mix has cinnamon in it, but more is better)

Your Tools:


  • A hand or stand mixer or food processor
  • A fork
  • Two mixing bowls
  • A 8 or 9 inch pie plate
  • Measuring cups, etc.


The Directions:

Step 1 -

Preheat your oven to 425F.

Step 2 -

We will be making the crust first. Put your butter in a regular sized bowl and microwave it for about 40 seconds. Then, add the sweetener and the almond flour as listed under "Crust" ingredients. Mix these ingredients with a fork until completely blended.


Step 3 -

Drop all the batter into your pie plate and use your fingers to press it along the bottom and up the edges. Refrigerate the crust for now.


Step 4 -

Okay, now we are making the pumpkin custard for the filling. Make sure you are using pure pumpkin and not pumpkin pie filling. You can put all the ingredients under "Pie Filling" in one bowl, in no specific order, and blend with your tool of choice (hand mixer, stand mixer, or food processor). The end result will look like pudding.


Step 5 -

Grab your pie crust out of the fridge and pour your pudding-like concoction into it, spreading it evenly. You may end up with extra filling (I did, and I used it to make mini personal pies). Put your pie in the oven and immediately turn the temperature down to 375F. After 15 minutes of baking at 375F, drop the temperature to 350F. The gradual change in temp will allow the crust to have some time to cook without overcooking the custard or burning the crust. Leave the pie baking at 350F for 30 minutes.


Step 6 -

Remove and let cool. The pie needs to be refrigerated once cooled. If you want to cover your pie with plastic or foil while refrigerating you can keep the condensation from dripping onto your pie or gathering onto your pie by laying a paper towel gently over the pie plate, putting the wrapping over it.
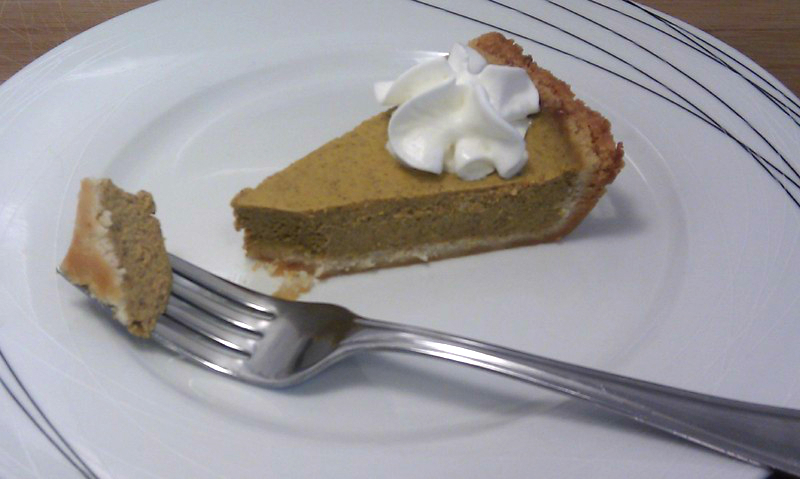

Finished Product

Enjoy this pie the day after with some real whipped cream and a coffee!


xo,
Jennifer

Sunday 7 October 2012

Chocolate Chip Muffins

Okay! In this particular post I have 3 slightly different chocolate chip muffin recipes (really, they just use different chocolate). All are delicious. Pick the one that's right for you. This recipe is additional to the base muffin mix I posted earlier.

Serving Size: 12 medium or 6 large
Nutritional Information
     Lindt Chocolate (90% or 75%) Chip Muffins: (per muffin, for 12 medium muffins) 147 calories, 8g of carbs & 3g of fiber (5g net carbs), 13g of fat, 4g of protein
     Hershey's Dark Chocolate (50% Cocoa) Chip Muffins: (per muffin, for 12 medium muffins) 165 calories, 10g of carbs & 3g of fiber (7g net carbs), 14g of fat, 4g of protein

Prep Time: 5 minutes
Cooking Time: 20 minutes

Your Ingredients:


  • All the ingredients from the base muffin mix
  • 1 teaspoon of vanilla extract
  • 2 squares of Lindt chocolate (90% or 75%) OR
  • 3 tablespoons of Hershey's dark chocolate chipits (50% cocoa)

Your Tools:


  • A mixing bowl
  • A muffin tin (and paper cupcake cups if you so desire. I like to use them because it keps my pans from getting ruined)
  • A hand or stand mixer
  • A fork

The Directions:

Step 1 -
Preheat your oven to 350F. Either grease your muffin tin or line the tin with paper cups.
Step 2 -
Put your butter in a small bowl and microwave it for about 40 seconds. While that's going, mix together all the dry ingredients in a mixing bowl using your fork. After it is all nice and blended, add the wet ingredients and mix with your hand mixer (or stand mixer).
If you are using Lindt chocolate squares, you have smash up the squares into little bits, chocolate chip sized!
batter for Lindt chocolate chip muffins

Step 3 -
Fill cups about 1/3 of the way (unless you want bigger muffins, then fill them 1/2 or so) with the batter. An ice cream scoop or cookie scoop works really well for this.
Step 4 -
If you made 12 medium muffins, bake them for 20 minutes. Take them out, test for doneness (poke with a toothpick). If they are still a little gooey, bake for a minute or two at a time until done. 
Step 5 -
Let the muffins cool in the tin for about 5 minutes, then remove. For those of you not using paper baking cups, the longer you leave your muffin to cool in the tin, the harder it will be to remove it without damaging the muffin.
Finished Product

Hershey's dark chocolate chip muffins
xo,
Jennifer

Pumpkin Spice Muffins

In the spirit of Thanksgiving (in Canada), here are some pumpkin spice muffins! Not pumpkin muffins. There's no actual pumpkin involved in this recipe. But they are tasty nonetheless, and are nice to have with morning coffee! This recipe is additional to the base muffin mix I posted earlier.

Serving Size: 12 medium or 6 large
Nutritional Information: (per muffin, for 12 medium muffins) 150 calories, 6g of carbs & 3g of fiber (3g net carbs), 13g of fat, 5g of protein

Prep Time: 5 minutes
Cooking Time: 20 minutes

Your Ingredients:

  • All the ingredients from the base muffin mix
  • 2 teaspoons of pumpkin pie spice mix
  • 1 teaspoon of cinnamon

Your Tools:

  • A mixing bowl
  • A muffin tin (and paper cupcake cups if you so desire. I like to use them because it keps my pans from getting ruined)
  • A hand or stand mixer
  • A fork

The Directions:

Step 1 -
Preheat your oven to 350F. Either grease your muffin tin or line the tin with paper cups.
Step 2 -

Put your butter in a small bowl and microwave it for about 40 seconds. While that's going, mix together all the dry ingredients in a mixing bowl using your fork. After it is all nice and blended, add the wet ingredients and mix with your hand mixer (or stand mixer).

Step 3 -
Fill cups about 1/3 of the way (unless you want bigger muffins, then fill them 1/2 or so) with the batter. An ice cream scoop or cookie scoop works really well for this.
Step 4 -
If you made 12 medium muffins, bake them for 20 minutes. Take them out, test for doneness (poke with a toothpick). If they are still a little gooey, bake for a minute or two at a time until done. 
Step 5 -

Let the muffins cool in the tin for about 5 minutes, then remove. For those of you not using paper baking cups, the longer you leave your muffin to cool in the tin, the harder it will be to remove it without damaging the muffin.
Finished Product

xo,
Jennifer

Saturday 6 October 2012

Base Muffin Mix

Alright so I had tried making some muffins last week and this is what I came up with. I took two batches of muffins to game night and they were a big success, so I highly recommend you try making these for yourself! This particular recipe is only a base mix (as I hope you could tell just from the title). So basically, you can use this recipe for just about any muffin you'd like to make. Add whatever you want, really, as long as it fits into your diet. After this post I am going to put up two more for muffins this weekend.

Serving Size: 12 medium or 6 large muffins
Nutritional Information: (per muffin, for 12 medium muffins) 149 calories, 5g of carbs & 3g of fiber (2g net carbs), 13g of fat, 5g of protein.

Prep Time: 5 minutes
Cooking Time: 20 minutes

Your Ingredients:

I'd like to point out that if you do not have coconut flour you can opt to use 2 cups of almond flour (total) instead. You should be able to get both types of flour from a bulk food store or a health food store.

  • 1 3/4 cups of almond flour
  • 1/4 cup of coconut, finely shredded
  • 1/3-1/2 cup of choice sweetener (I am using powdered splenda)
  • 1/2 teaspoon of salt
  • 2 teaspoons of baking powder
  • 1/3 cup of water
  • 2 large eggs
  • 1/2 stick of butter (about 4 tablespoons), melted

Your Tools:

  • A mixing bowl
  • A muffin tin (and paper cupcake cups if you so desire. I like to use them because it keeps my pans from getting ruined)
  • A hand or stand mixer
  • A fork

The Directions:

Step 1 -
Preheat your oven to 350F. Either grease your muffin tin or line the tin with paper cups. 
Step 2 -
Put your butter in a small bowl and microwave it for about 40 seconds. While that's going, mix together all the dry ingredients in a mixing bowl using your fork. After it is all nice and blended, add the wet ingredients and mix with your hand mixer (or stand mixer). 

Step 3 -
Fill cups about 1/3 of the way (unless you want bigger muffins, then fill them 1/2 or so) with the batter. An ice cream scoop or cookie scoop works really well for this. 
Step 4 -
If you made 12 medium muffins, bake them for 20 minutes. Take them out, test for doneness (poke with a toothpick). If they are still a little gooey, bake for a minute or two at a time until done. 
Step 5 -
Let the muffins cool in the tin for about 5 minutes, then remove. For those of you not using paper baking cups, the longer you leave your muffin to cool in the tin, the harder it will be to remove it without damaging the muffin.
Leave your muffins out on a cooling rack of some kind until completely cool, and store. Refrigerate for longer life, as there is no sugar to act as a preservative. 


No finished product picture here since I didn't actually make plain muffins! But I made other tasty muffins, coming up.

xo,
Jennifer