Showing posts with label low-carb. Show all posts

Wednesday, 17 September 2014

Bacon-Wrapped Mushroom Poppers

So. I've got an hour and a half of free time. Well, not really free time. I could be doing something school-related, but I feel like blogging instead. Remember my loaded portobello mushrooms? I do. I loved them, especially because they gave me tons of new ideas. This mushroom-craze I've been having is seriously weird, though, because I always hated mushrooms growing up. I'm still trying to wrap my head around my new fascination.

Anyway, I bring you mushroom poppers. Why mushroom poppers instead of jalapeño poppers? Well, simply because I wanted my poppers to be reliable. I love the idea of jalapeño poppers. I love peppers, cheese, and bacon. I've made poppers plenty of times, including making batches for family. However, I have found jalapeños to be far too unpredictable for me. I'm not used to a lot of hotness, so if I get a batch that turns out to be particularly spicy... well, consider me a baby when that happens. With mushroom poppers, not only can I still have them spicy, I can control how spicy they are!
 

Funny story, though...

I actually didn't make these for myself. That's right, I wanted to make something delicious for other people. Actually, for my dad. He and the rest of our immediate family came over to my house for dinner to celebrate his 60th 59th (hehe...) birthday. There was so much food! Hamburgers, hot dogs, salad, traditional deviled eggs as well as avocado-bacon deviled eggs (made by yours truly), black forest cake (my mum made it for the first time!), and new-york style low-carb cheesecake (also made by yours truly). 

Uh, but I also made these bad boys. They were the first thing I made, and I was super excited to share them because my dad and brother really enjoy mushrooms. I tossed them in the oven (not to bake, just so they didn't take up space) and, well. Yeah. I completely forgot about them. It wasn't until I got ready for bed and thought "Did I turn the oven off?" when I realised... I hadn't used the damn oven! My mushroom poppers, nooooo! I'm not used to having more than two extras over for dinner, so any time family is over to eat I get a little stressed. Oops!

Ingredients
  • 12 small-medium white button mushrooms 
  • 12 slices of bacon 
  • 6 tbsp (1/4 c + 2 tbsp) cream cheese, flavoured if desired (softened, or use spreadable)
  • ~200g cheddar cheese (~15g per mushroom)
  • 1 tbsp hot sauce (I used Frank's Redhot)
  • 1/2 tbsp red pepper flakes (1/2 tbsp plus the Franks creates a medium spice level)
If you want to make more or less than one batch, match the ingredients to the number of mushrooms you have. That is, 1 mushroom + 1 slice of bacon + 1/2 tbsp of cream cheese + 15g of cheddar cheese. Adjust the spice level to your preferences! 

Nutritional information, per serving (1): 179 cals, 2g net carbs (2g carbs, 0g fiber), 16g fat, 8g protein
Nutritional information, whole batch: 2152 cals, 18g net carbs (21g carbs, 3g fiber), 190g fat, 90g protein

Ingredients
Calories
Net Carbs (g)
Carbs (g)
Fiber (g)
Fat (g)
Protein (g)
~200g white mushroom
44
5
7
2
1
6
12 slices of bacon
1140
6
6
0
108
36
1/2 cup cream cheese
240
6
6
0
21
6
~180g medium cheddar
720
0
0
0
60
42
1/2 tbsp red pepper flakes
8
1
2
1
0
0

Directions
If you're like me and enjoy a firmer piece of bacon, cook it ahead of baking. I put my bacon on the stove while I prepped the other ingredients, cooked it to the point where I would eat it, and I could still move it without breaking it apart, so not very crispy (see the second picture posted above). We'll be baking these bad boys later, so the bacon will finish off nicely.
Preheat your oven to 375F. 
While your bacon is cooking, rinse and dry your mushrooms. Remove stems and gently scoop out the gills. I say gently because mushrooms are delicate and we don't want to split them right in half. A couple cracks won't hurt, though. 
Rinsed, dried, stems removed.
I used a strawberry huller to scrape out the gills and a little flesh, too. (not my flesh!)  
Check your bacon for doneness, making sure you don't cook the strips to a crispy level. 
Also cut your cheddar cheese into 12 cube-like pieces (or however many you need), small enough to fit inside the mushrooms. You could also shred the cheese, but this is way easier.
These are ~15g each
In a small-medium mixing bowl, mix cream cheese, hot sauce, and red pepper flakes. I used a hand mixer for about 2 minutes during this step. The mix was super creamy and had no lumps of still-cold cream cheese. 
Next, we're going to fill the mushrooms. Again, the mushrooms are delicate, so I highly recommend using a piping bag. If you don't have one, put your cream cheese mix in a plastic baggie and cut the tip off. Pipe the mix into the mushrooms, about 2/3 full, leaving room for the cheese cubes.
Oops. Some of these are not 2/3...
Then top with cheese cubes.
Next, I cut each of my bacon pieces at the 2/3 mark and placed the 1/3 pieces over the mushrooms. This is totally optional; I did it because the strips were too long for a simple wrap-around. Regardless, wrap your cheese mushrooms with bacon and secure using a toothpick. Note: Don't use mint flavoured tooth picks :(

I used cupcake liners to minimize the greasy mess when baking!
Bake at 375F for 10 minutes, or freeze. If freezing and cooking later, I'd add an extra 3-5 minutes on the cooking time. 

Mmm!
xo, Jennifer

Tuesday, 9 September 2014

Loaded Portobello Mushrooms

Since I moved out of my mum's house and my SO and I moved into our own place, my mum and I have gone grocery shopping every Sunday (except in special circumstances). We consider it quality mother-daughter time. We get to catch up about our previous week, gossip a little bit, and discuss food - something we both love! Last Sunday while driving around we spent a considerable amount of time figuring out what we would have for our respective dinners, since neither of us had bothered to plan anything.

After inviting myself and the SO over to my mum's for dinner, I wandered around the grocery store for a bit. As I picked up green peppers I thought to myself "what am I going to do with these? I really should have planned ahead... Oh! Stuffed peppers! I haven't had those in forever." Of course, I had invited myself to my mum's so I suggested stuffed peppers. She agreed. Then I saw portobello mushroom caps! Remembering pictures of recipes I've never tried, I asked my mum if she would make some so I would know if I liked them. Neither my mother or I particularly enjoy mushrooms, however, so at least if I didn't like them, both my step-father and my brother do. However, given that neither of us typically cook with mushrooms, we had no idea what to do with them. All I could think was cheese and bacon, because when is cheese and bacon not a good idea? That's how I got the idea of loaded portobello mushrooms (like loaded baked potatoes... without the potatoes!).


I KNOW. What a glorious idea. Put the cheese and bacon in the mushroom. Delicious. So, of course, after tasting the delicious creation at my mum's place I had to make it myself at home. Fortunately for me, this is one meal the SO refuses to try (I push him pretty far with all the veggies), so more for me!

This is a super simple, super quick, super delicious recipe. I found the mushroom to be incredibly flavourful, so with all the cheese, bacon, etc, I didn't feel it was necessary to spice this up.

Ingredients

I only cooked 2 caps this time, but I'm going to include ingredients for 4 servings.

  • 4 portobello mushroom caps
  • 6 slices of bacon
  • 120g choice cheese (I used marble), shredded
  • 1/4 c green onion, chopped
  • 1/2 c sour cream (I used 14%)
Nutritional information, per serving (4): 371 cals, 4g net carbs (5g carbs, 1g fiber), 35g fat, 15g protein
Nutritional information, whole batch: 1484 cals, 17g net carbs (21g carbs, 4g fiber), 138g fat, 61g protein


Ingredients
Calories
Net Carbs (g)
Carbs (g)
Fiber (g)
Fat (g)
Protein (g)
4 portobello caps (~50g each)
44 5 8 3 8 4
6 slices of thick cut bacon
750 3 3 0 72 24
120g marble cheese
480 0 0 0 40 28
1/4 c green onion
10 1 2 1 0 1
1/2 c 14% sour cream
200 8 8 0 18 4

If there are other ingredients you're going to put in your loaded potato portobello mushrooms, let me know!

Directions
First, preheat your oven to 400F. Make bacon bits however you normally make them. Chop green onion until you have about 1/4 cup. Shred whatever type of cheese you plan on using and measure out 120g. 
Remove the stem and gills from the mushroom caps, and even scoop out a little of the flesh if you desire. We're making room for cheese and bacon, after all. My caps ended up being about 50g each after this process.
Put about 30g of cheese in each cap. Top with bacon bits (I used about 1.5 slices per cap) and ~1 tbsp of green onion. 
Place your caps on a baking sheet and pop them in the oven for about 10 minutes or until all the cheese is deliciously gooey. Remove, top each with 2 tbsp of sour cream, and stuff them in your face!

This is the delicious meal I had at my mum's! Check out all that cheese. LOOK AT IT.
Stuff all the food!
What do you do with your mushrooms?

xo, Jennifer

Monday, 1 September 2014

Almond PIZZA Crust and the Ultimate Low-Carb Pizza List

HELLO PIZZA LOVERS. I am excited to share this super simple pizza crust recipe with you guys. Okay? I am 100% sure that you've all already got your FAVOURITE low-carb pizza go-to (mine happens to actually be pizza bowls). But maybe you should try something new for once? Maybe? I mean, it is still pizza so it won't be that new.

Before we get started can we just stop to take a look at the keto pizza options? I mean for real. LOOK.

THE LIST

Who says this is the ultimate list? Well, I do. Obviously. I grabbed links off the first page of Google did hours of extensive research in order to find you all a plethora of keto pizza recipes to try. Ordered alphabetically, I've bolded the ones I've tried.

Note: this is certainly not an exhaustive list of all the low-carb pizza recipes out there, but this should get you started on a great and tasty adventure. If your favourite isn't listed, be sure to comment with a link and I'll get it up ASAP.
bacon and meatballs. yeah.
So if there are so many other recipes, why am I putting this up? Well, for one, why not add to the incredibly delicious list of pizza options? Two, because my recipe uses three simple ingredients, and not a lot of them. I was making a whipped jell-o pie the other day and thought, why haven't I tried using this crust for pizza? It holds up so well with pie, especially after resting for a few hours. So, I tried the same crust recipe and came up with this: 

Which, really, was quite delicious. But as you can see, the crust definitely didn't turn out. With the almond pie crust, it is best to let it chill if you're not baking it, or bake it and then let it chill, and then let it plus the pie filling chill, in order for it to hold together properly. 

To use the crust almost immediately, I'd need a better binding agent. Obviously, I didn't want to weigh this baby down with too many other ingredients, so cheese was out (besides, there are so many existing cheese recipes). I decided to try one egg. Woohoo! It turned out great.

This crust is ideal for thin crust lovers, though it doesn't get as crispy as that "real" hand-tossed, thin-crust pizza. I've had success making a ~8 inch pizza, and ~10 or so inch pizza with this crust, the smaller being a little thicker than the larger of course. 

Warning: If you're not a fan of almond flour, well, sorry (not sorry).

Ingredients

  • 1 c almond flour/ground almonds
  • 1/4 c butter, salted (or unsalted, then add salt to taste)
  • 1 large egg, whole
*Note: "Nutritional information" does not include any toppings. 
Nutritional information, per serving (#): 128 cals, 2g net carbs (3g carbs, 1g fiber), 12g fat, 3g protein
Nutritional information, whole batch: 1026 cals, 9g net carbs (20g carbs, 11g fiber), 99g fat, 26g protein


Ingredients
Calories
Net Carbs (g)
Carbs (g)
Fiber (g)
Fat (g)
Protein (g)
1 c almond flour
549
8
19
11
48
20
1/4 butter
407
0
0
0
46
0
1 large egg
70
1
1
0
5
6

Directions
Preheat your oven to 350F and prep a baking pan with parchment paper. You won't need to grease your pan. I used a springform base for my smaller pizza, and then just a large round cookie sheet for the larger one.
Melt 1/4 c butter (salted or unsalted). Add the butter to 1 c almond flour, a pinch or so of salt (if you used unsalted butter), and one large egg. Mix them all together with a fork until you get a disgusting looking mess in a bowl. Your batter should be awfully sticky/gooey, etc.
Drop all your batter on your pan lined with parchment paper and spread it out. Because it is so sticky, you can dampen your hands so the batter doesn't stick to you as much. Just don't add cups of water to the batter. 

Once you've got your batter spread to a desirable size, pop it in the oven for about 10 minutes, or until the crust has dried and the edges are browning. 


Add your desired toppings. 
1/4 c pizza sauce, 6 slices of bacon (chopped), 30g goat cheese, 1/2 c pizza mozzarella, 1/4c nacho cheese, 1 tbsp hot sauce
Bake your pizza on 350F for about 15 minutes or until cheese is melted.

Slice your pizza in 8-12 slices or whatever you want. Put it in your mouth and enjoy it.


Don't forget to let me know what your favourite low-carb pizza is, crust or no crust!
xo, Jennifer

Monday, 25 August 2014

Cheesecake (New York Style, Almond Crust)

Cheesecake is one of our favourite desserts in this household, and I've been making low-carb cheesecakes since my first time doing keto. They're fun to cook and easy to adjust for flavours. I'm not sure why I never posted a recipe! I have plenty of pictures and instructions, so I'm going to post them today. This recipe is going to be for a New York style cheesecake, but you can expect chocolate drizzle with brownie crust, chocolate swirl, maple pecan, and strawberry flavours soon enough!
Left: New York cheesecake bars with almond coconut crust
Right: peanut butter fudge bars with almond coconut crust
---

Ingredients
Ignore "sugar"!!!
This picture is from when I made cheesecake for my mum, and she dislikes hates sweeteners
Crust

The crust we will be using for this, whether you're making bars or a round cheesecake, is almond coconut crust. If you're adding flavours to this cheesecake and you want to change up the crust, swap out the coconut for another kind of filler, such as crushed pecans.

  • 3/4 cup ground almonds
  • 1/4 unsweetened coconut, shredded
  • 1/4 cup granulated sweetener, or equivalent (I'm  using Splenda)
  • 1/4 cup unsalted butter, melted
Filling


  • 2 bricks (16 oz) plain cream cheese, softened
  • 1/2 cup granulated sweetener, or equivalent (I'm using Splenda)
  • 1/4 cup (4 tbsp) heavy whipping cream
  • 2 large eggs, whole
  • 1 tbsp vanilla extract
  • pinch of salt (optional)
Nutritional info, per serving (12): 239 cals, 4g net carbs (5g carbs, 1g fiber), 22g fat, 5g protein
Nutritional info, whole batch: 2867 cals, 49g net carbs (59g carbs, 10g fiber), 263g fat, 61g protein

Ingredients
Calories
Net Carbs (g)
Carbs (g)
Fiber (g)
Fat (g)
Protein (g)
3/4 cup ground almonds
412
6
14
8
36
15
1/4 cup unsweetened coconut
71
1
3
2
7
1
1/4 cup unsalted butter
407
0
0
0
46
0
3/4 cup Splenda
0
18
18
0
0
0
16 oz plain cream cheese
1600
16
16
0
144
32
2 large eggs
140
2
2
0
10
12
1/4 cup heavy whipping cream
200
4
4
0
20
1
1 tbsp vanilla extract
37
2
2
0
0
0


---

Directions:
We're going to start off by making the crust. First, preheat your oven to 350F and grease the bakeware you plan on using (a kick-ass brownie pan like mine, a 9 or 8 inch springform pan, ramekins, etc).
Melt 1/4 cup of unsalted butter. Mix dry crust ingredients in a bowl and add the melted butter. Spread the dough throughout your pan. I usually start from the middle and work my way out (using my fingers). It might look like you don't have enough, but you do: 
You can choose whether to bake your crust or not. You aren't using any ingredients in the crust that will harm you if you don't bake it now, and you will be baking it later. If you decide to bake the crust, pop it in the oven for roughly 10 minutes or until lightly browned. Be careful not to burn the crust. After baking (or if you didn't bake it), put your dough in the fridge for 20-30 minutes.
While your dough is chilling, make the filling for your cheesecake. An easy way to soften cream cheese is to leave it on the counter for a few hours the day you know you're going to make cheesecake. If you didn't do that, however, just pop your cream cheese in a microwavable bowl and microwave it for 20-30 seconds. To make softening easier, cut the cream cheese into slices/cubes/portions (by the way, the same works for butter!). 
I left these out all afternoon so I didn't need to bother chopping them up. 
Whip up your filling ingredients (16 oz cream cheese, 1/4 cup heavy whipping cream, 2 eggs, 1 tbsp vanilla, 1/2 cup granulated sweetener, and a pinch of salt). Unfortunately I don't have a picture of what the above looked like after mixing. 
This is from the cheesecake bars I made for my mum.
I picked up this kick-ass brownie pan from Stokes for $11 and I LOVE it.
Carefully pour your filling into your crust-lined pan. The crust is delicate so try not to push it around. Bake your cheesecake at 350F for 45 minutes to an hour.
Note: I don't use water baths for these, but if you're concerned about your cheesecake drying out, go ahead and use a water bath. To do so, wrap your pan in foil to make it water tight, put the pan in roasting bakeware and add some water. Check out this video for some tips on this process. 
This is one of the first few cheesecakes I ever made with this recipe.
A New York style cheesecake with a brownie base. Mmm!
Carefully remove your cheesecake from the oven and let it cool for 10-20 minutes, then place in the refrigerator for about 3 hours.
Send me some pictures if you make this cheesecake! I'd love to see them!

xo,
Jennifer

Saturday, 23 August 2014

Simple Sloppy Joe Meat

I really love me some saucy, sloppy meat. For a while when you start doing low-carb you think you'll never get to have recipes like chili, spaghetti, and sloppy Joes again. After all, these things are typically loaded with brown beans, kidney beans, onions, tomatoes, etc.  After a while of cooking for this way of eating the reality becomes clear. You can still have these things, and easily make them low carb! Unlike low-carb baked goods, you don't even have to break the bank buying super specialty items like almond and coconut flour. Plus low-carb dinners are often less complicated/ingredient heavy than their full-carb counterparts. Even if you can't replicate mom's cooking, you can still have some staple keto recipes.

Earlier I posted my cheesy sloppy Joe chicken (which I'll be making again... soon), so today I'm making a dedicated post just for the sloppy meat.


As mentioned, I use this simple low-carb mix with these egg buns, but I've recently used it with a modified version of this stromboli dough. I even considered making extra batches and freezing them for later, or putting some in the fridge for lunches. I'd like to try this recipe in my crustless quiche, as well as using it for meat pie. Who doesn't love meat pie?

this is a stromboli dough pocket stuffed with sloppy meat :)
---
Ingredients

  • 1 lb ground beef, lean or medium (I am using lean. It was on sale! Use medium if you want a higher fat content)
  • 1/4 cup sugar free ketchup (I used this)
  • 1/4 cup tomato sauce (I went with Classico Tomato & Basil, but you can use any kind you have, from pasta sauces to pizza sauces, or even just use tomato paste)
  • 1 tbsp hot sauce (Frank's RedHot Buffalo Sauce is my choice)
  • 1/2 tbsp garlic powder

The tiny Club House jar contains Frank's RedHot Buffalo sauce and
spices which I mixed and had leftover from chicken wing night!
*Note: "Nutritional Info" does not include optional ingredients. See "Optional Filler Ingredients" below.
Nutritional Info, per serving (6): 172 cals, 3g net carbs (3g carbs, 0g fiber), 12g fat, 16g protein
Nutritional Info, whole batch: 1029 cals, 13g net carbs (15g carbs, 2g fiber), 69g fat, 93g protein


Sloppy Joe Meat Ingredients
Calories
Net Carbs (g)
Carbs (g)
Fiber (g)
Fat (g)
Protein (g)
1lb lean ground beef
951
0
0
0
68
91
1/4c sugar-free ketchup
20
4
4
0
0
0
1/4c tomato sauce
25
4
5
1
1
1
1 tbsp hot sauce
5
0
0
0
0
0
1/2 tbsp garlic powder
28
5
6
1
0
1

Optional Filler Ingredients
Calories
Net Carbs (g)
Carbs (g)
Fiber (g)
Fat (g)
Protein (g)
1/2c white mushroom pieces
8
1
1
0
0
1
1/2c canned wax beans
15
2
3
1
0
1
1/2c chopped zucchini
10
1
2
1
0
1
1/2c chopped cauliflower
13
2
3
1
0
1

While this post is my "Simple Sloppy Joe Meat" recipe, you can include a filler or two to amp up the flavour and add variety to each bite! I've included four possibilities to get you started (above). For every 1/2 cup of filler you include, be sure to include 1tbsp each of ketchup and/or tomato sauce, rather than just adding more water (we don't want to dilute the flavour of the sauce!).

A word about ketchup: if you don't have or cannot find sugar-free ketchup, you can use regular ketchup. Regular ketchup definitely has more carbs, so make sure you keep track of how much you use. I prefer the sugar-free ketchup in this recipe because it has more of a tangy vinegary flavour that I associate with sloppy joe sauces from my childhood. Alternatively, you could omit the ketchup and just use more tomato sauce, or a low-carb BBQ sauce if you have it. Play with the flavour and see what you like best!

---
Directions
Start out by putting your ground beef in a 3 quart sauce pan. Add 1/2 cup of water and cook on medium-low until most of the meat has browned.
Some meat is still pink. No problem, we'll be cooking it some more later
Using a collander, strain your beef. If you're adding any fillers, let the beef rest in the strainer while you cook them. Toss your choice of filler in the sauce pan and cook until soft. If you're using a hard veggie, such as cauliflower, you may want to steam or boil it first.
Once your filler is at the desired doneness, add back your meat and mix them together on low heat.
Add your sauces (1/4c sugar free ketchup, 1/4c tomato sauce, 1 tbsp hot sauce) and 1/2 tbsp of garlic powder to the pan. If you prefer spicy foods, don't be afraid to add as much hot sauce as you desire. 
Add back 1 tbsp of hot water at a time if you want a saucier texture. Be careful of adding too much, as we are using a small amount of sauce to begin with so it will be easy to dilute. If you find you have diluted the sauce, just add back a tbsp at a time of ketchup or tomato sauce.  
Once everything is mixed thoroughly and cooked (5-10 minutes), add your sloppy joe meat to whatever other food you're using. Eggs? Tasty! Low-carb wraps? Convenient! Keto buns? Filling! Stromboli? Delicious, obviously.  
I added the meat to some rolled out stromboli dough and made "hot pockets" out of them. Yum!

As always, please enjoy.
xo, Jennifer

Thursday, 21 August 2014

Cheesy Sloppy Joe Chicken

I miss the meals my mum makes, especially my favourite comfort foods like chili, brownies, loaded garlic toast, and sloppy joes. She'd buy plain hamburger buns, make a super saucy meat and bean mixture, line some buns with cheese, and load up my plate. Mmmm. I could eat leftover sloppy joe meat for days. I've made sloppy joes before doing keto, using a similar recipe to what I will be posting here, and slapping the meat on these egg buns. It tastes close to what my mum used to make, minus all the beans.

I love chicken but I want to mix things up now and then so we don't get bored of it, and I was thinking, what should I stuff these breasts with? Ham and cheese? Nah, been there, done that. Pizza? Again, need something newish... Ground beef? That could be awesome. Plain ground beef? Bleh... boring! Taco meat? Spaghetti style sauce? Chili? Sloppy Joe meat?! YES. Sloppy Joe meat! So, I bring you, chicken breasts stuffed with sloppy ground beef and cheese, crusted with more cheese. Please enjoy.

If these weren't so freakin' hot I would have eaten it like a burger!
SERIOUSLY STUFFED!

Servings: 4
Nutritional Info (I didn't weigh the meat so these values are estimates at best):
Total:1,128 cals11g carbs1g fiber58g fat129g protein
Per Serving:282 cals3g carbs0g fiber15g fat32g protein
Prep Time: 20 minutes
Cooking Time: 30 minutes

Your Ingredients:

  • 4 boneless, skinless chicken breasts
  • 1/2 lb ground beef (I used lean this time because it was on sale. For higher fat content, use medium)
  • 80g (~1/4c) shredded cheese (I used mozza)
  • 2 tbsp sugar free ketchup (I used this)
  • 2 tbsp tomato sauce (I went with Classico Tomato & Basil)
  • 1/2 tbsp hot sauce (Frank's Red Hot Sauce is my choice)
  • 1 tsp garlic powder
  • 1/4 c grated parmesan cheese (optional)
  • 1-2 tsp garlic salt (optional)

Your Tools:

  • a 1.5 quart or 3 quart sauce pan
  • a baking dish
  • a colander

The Directions:
Preheat your oven to 375-400F. Put your ground beef with about 1/4 cup-1/2 cup of water in your sauce pan and cook on medium-low. 
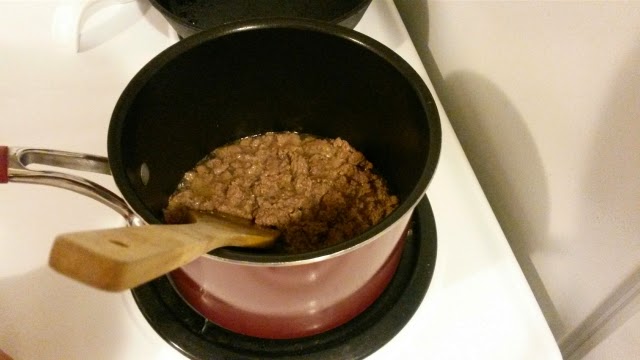
this has already been cooking for a few minutes... duh!
While your beef cooks, butterfly your chicken breasts. That is, slice your chicken breasts almost completely in half so they open like a book and look like messy hearts! Also press the meat out so your breasts are of even thickness. I actually used a meat tenderizer for funsies. If you're not sure how to do that, this video is pretty handy. 
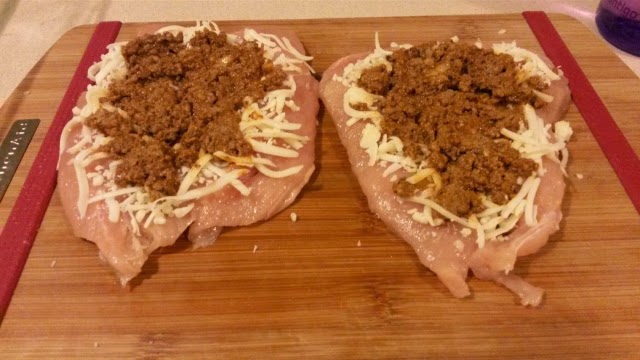
these are particularly ugly :( the other two looked like adorable hearts but the SO was taking the pictures... *cough* 
Sprinkle some shredded cheese on all 4 chicken breasts. Save a bit for garnish.
p.s. I got this kickass cutting board at Costco. The silicone strips keep the board from sliding!
Now let's finish the sloppy joe meat. Strain the meat and put it back in the sauce pan on low heat. Add ketchup, tomato sauce, hot sauce, and 1 tsp garlic. Stir until mixed thoroughly. Add back a tbsp at a time of hot water if you'd like a saucier texture. 
Divide the beef mixture among your cheesy chicken tits. Spread the meat around or just smack it in the middle.  
Fold your chicken tits closed. Be careful not to make a mess. Sprinkle the remaining mozza cheese on the chicken breasts, as well as one tbsp of parmesan cheese and some garlic salt if desired. Spray with a cooking oil (I used olive oil) or carefully brush with melted butter. The video I linked above suggests tying the breasts closed. I don't think that is entirely necessary, but go ahead if you want to feel fancy!
Pop the cheesy sloppy joe chicken breasts in the oven and bake for 30-45 minutes! I cooked mine at 400F for 40 minutes. I checked them at 30 minutes and they were still slightly pink.
Enjoy!

xo,
Jennifer