Thursday, 21 August 2014

Cheesy Sloppy Joe Chicken

I miss the meals my mum makes, especially my favourite comfort foods like chili, brownies, loaded garlic toast, and sloppy joes. She'd buy plain hamburger buns, make a super saucy meat and bean mixture, line some buns with cheese, and load up my plate. Mmmm. I could eat leftover sloppy joe meat for days. I've made sloppy joes before doing keto, using a similar recipe to what I will be posting here, and slapping the meat on these egg buns. It tastes close to what my mum used to make, minus all the beans.

I love chicken but I want to mix things up now and then so we don't get bored of it, and I was thinking, what should I stuff these breasts with? Ham and cheese? Nah, been there, done that. Pizza? Again, need something newish... Ground beef? That could be awesome. Plain ground beef? Bleh... boring! Taco meat? Spaghetti style sauce? Chili? Sloppy Joe meat?! YES. Sloppy Joe meat! So, I bring you, chicken breasts stuffed with sloppy ground beef and cheese, crusted with more cheese. Please enjoy.

If these weren't so freakin' hot I would have eaten it like a burger!
SERIOUSLY STUFFED!

Servings: 4
Nutritional Info (I didn't weigh the meat so these values are estimates at best):
Total:1,128 cals11g carbs1g fiber58g fat129g protein
Per Serving:282 cals3g carbs0g fiber15g fat32g protein
Prep Time: 20 minutes
Cooking Time: 30 minutes

Your Ingredients:

  • 4 boneless, skinless chicken breasts
  • 1/2 lb ground beef (I used lean this time because it was on sale. For higher fat content, use medium)
  • 80g (~1/4c) shredded cheese (I used mozza)
  • 2 tbsp sugar free ketchup (I used this)
  • 2 tbsp tomato sauce (I went with Classico Tomato & Basil)
  • 1/2 tbsp hot sauce (Frank's Red Hot Sauce is my choice)
  • 1 tsp garlic powder
  • 1/4 c grated parmesan cheese (optional)
  • 1-2 tsp garlic salt (optional)

Your Tools:

  • a 1.5 quart or 3 quart sauce pan
  • a baking dish
  • a colander

The Directions:
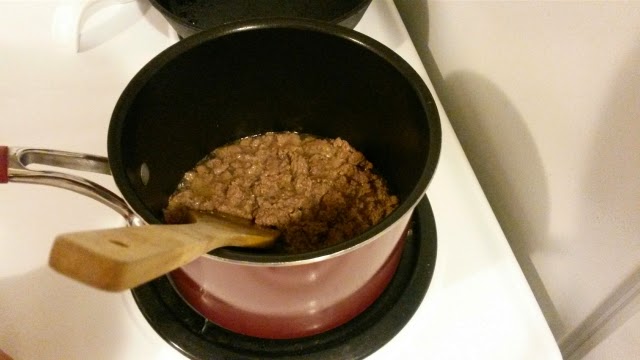
Preheat your oven to 375-400F. Put your ground beef with about 1/4 cup-1/2 cup of water in your sauce pan and cook on medium-low. 
this has already been cooking for a few minutes... duh!
While your beef cooks, butterfly your chicken breasts. That is, slice your chicken breasts almost completely in half so they open like a book and look like messy hearts! Also press the meat out so your breasts are of even thickness. I actually used a meat tenderizer for funsies. If you're not sure how to do that, this video is pretty handy. 
these are particularly ugly :( the other two looked like adorable hearts but the SO was taking the pictures... *cough* 
Sprinkle some shredded cheese on all 4 chicken breasts. Save a bit for garnish.
p.s. I got this kickass cutting board at Costco. The silicone strips keep the board from sliding!
Now let's finish the sloppy joe meat. Strain the meat and put it back in the sauce pan on low heat. Add ketchup, tomato sauce, hot sauce, and 1 tsp garlic. Stir until mixed thoroughly. Add back a tbsp at a time of hot water if you'd like a saucier texture. 
Divide the beef mixture among your cheesy chicken tits. Spread the meat around or just smack it in the middle.  
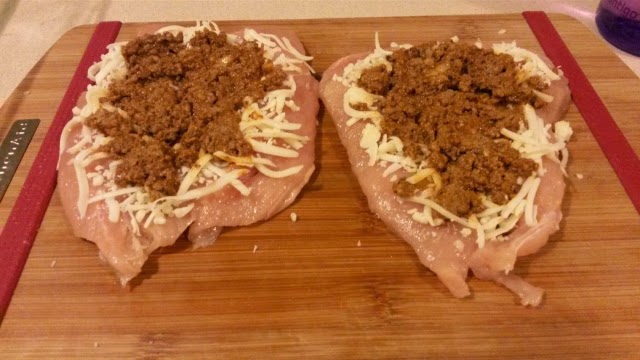
Fold your chicken tits closed. Be careful not to make a mess. Sprinkle the remaining mozza cheese on the chicken breasts, as well as one tbsp of parmesan cheese and some garlic salt if desired. Spray with a cooking oil (I used olive oil) or carefully brush with melted butter. The video I linked above suggests tying the breasts closed. I don't think that is entirely necessary, but go ahead if you want to feel fancy!
Pop the cheesy sloppy joe chicken breasts in the oven and bake for 30-45 minutes! I cooked mine at 400F for 40 minutes. I checked them at 30 minutes and they were still slightly pink.
Enjoy!

xo,
Jennifer

Thursday, 7 August 2014

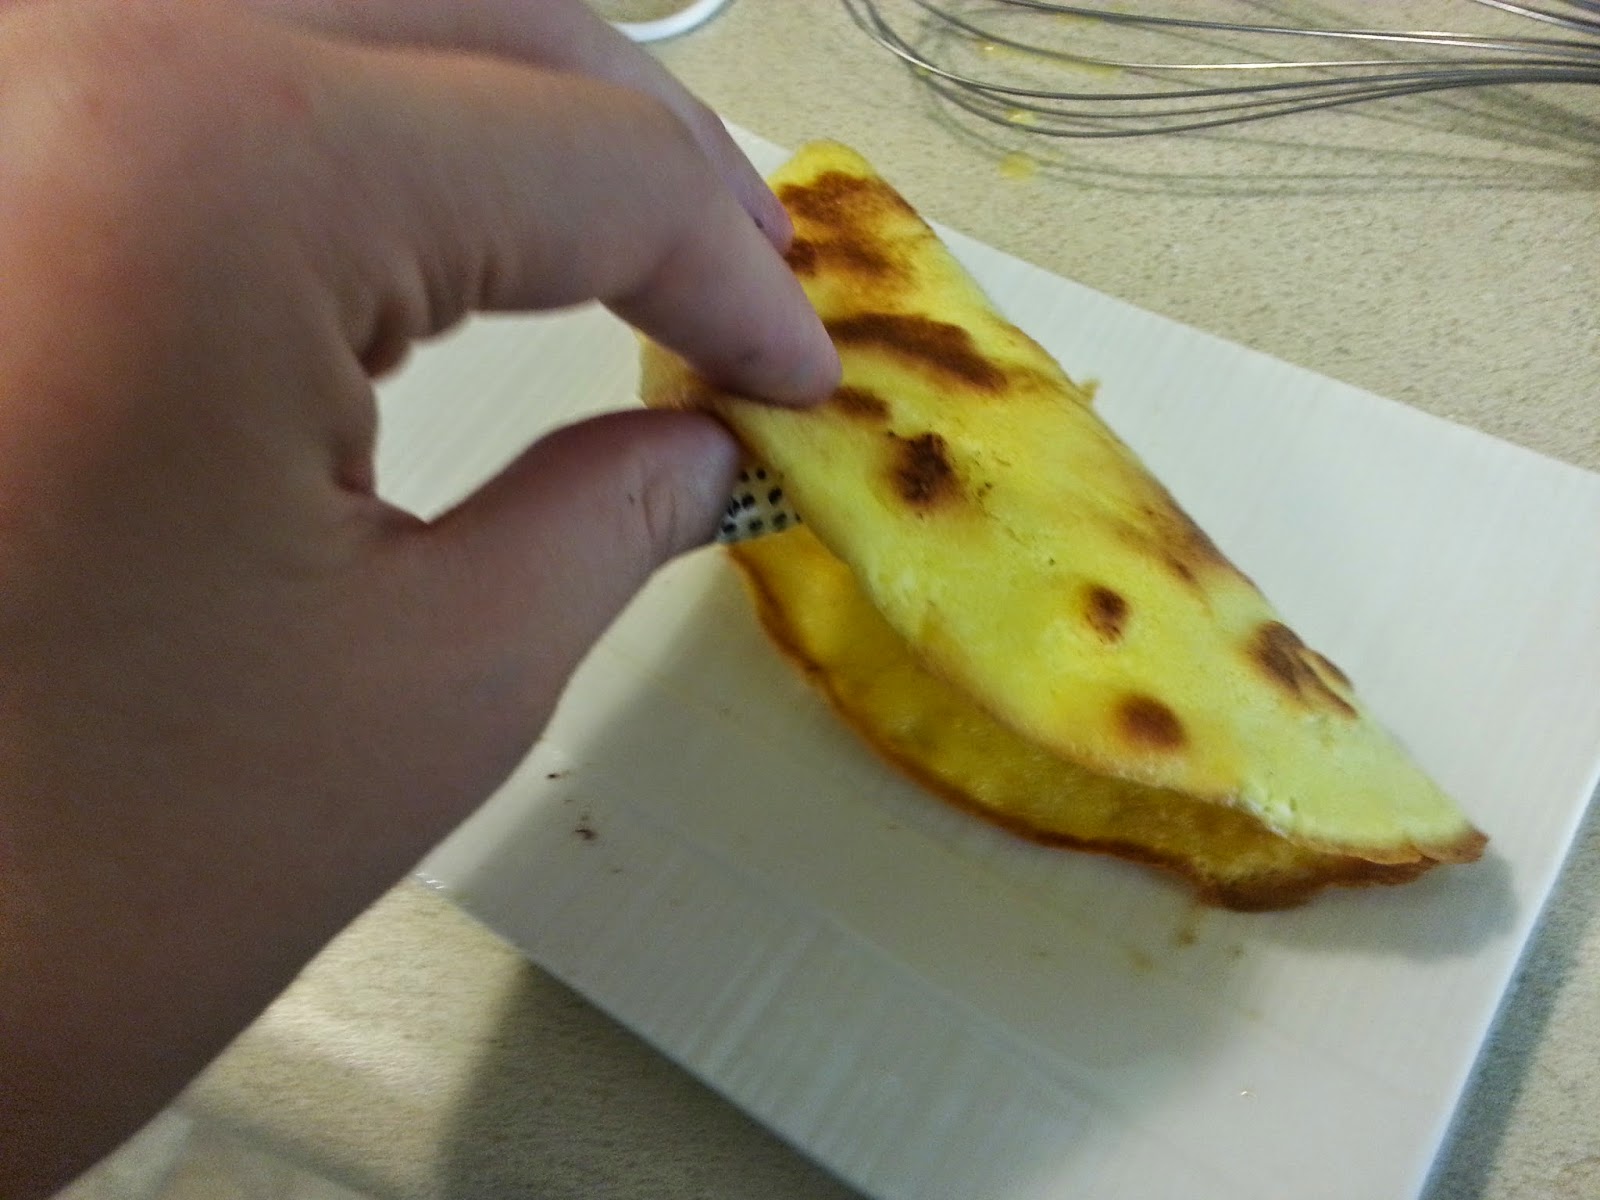
Egg Crepes

Hi everyone! The other day I posted a recipe my household really enjoys: egg waffles! Two points to make about that recipe:
1) yes, they are sweetened scrambled eggs. The recipe is pretty much a scrambled egg recipe plus sweetener (eggs and dairy! or water!). That was the point of my original egg waffle recipe; I didn't want all those extra things like flour and cream cheese... basically, I wanted the end result to include syrup and peanut butter traps. YUM. 
2) Waffles require a waffle maker; making the recipe into crepes/pancakes might be tricky. That is why I am making this post :)! I want everyone to be able to enjoy my favourite meals (or at least try them). Therefore, I'm going to have egg pancrepes for lunch today so I can take pictures! I really hope this post is helpful!
I'm going to use most of the same information from my waffle post, but note that I'll only be making half a batch... no one else is home to eat them with me :(.

I put 1/2 tbsp of whipped peanut butter in each and drizzled 1-2 tbsp on top. 

I am referring to these as pancrepes/crepecakes because I have never made them thin enough to be called crepes, but I don't find them thick enough to be called pancakes, but next time I make this recipe I am going to try to make them verrryy thin and see how they turn out. Result: excellent!

I used 2 tbsp of unsweetened cocoa for extra chocolatey goodness. 

Also, the texture of the egg pancrepes is completely different than that of the egg waffles. I'm sure you can imagine if you've had "regular" crepes and waffles before. I would describe the egg pancrepes as dense and moist, basically the opposite of how I would describe the waffles.

Servings: 4 servings (4-6 crepes)

Time: 10-15 minutes

Nutritional info (per 1 serving): 122 cals, 3g net carbs (3g carbs, 0g fiber), 10g fat, 7g protein

Ingredients


  • 4 large eggs
  • 4 tbsp of heavy whipping cream
  • 2-4 tbsp of sweetener (depending on how sweet you want them. I usually use 2 tbsp)
  • 1-2 tbsp cocoa powder or 1/2-1 tbsp cinnamon [optional]
Tools
  • electric whisk or stand mixer (I'm using a Cuisinart electric mixer)
  • a mixing bowl
  • a small frying pan (I used an 8 inch pan)
Directions
Preheat and grease your waffle maker frying pan on medium-low. Beat/whisk the crap out of the eggs, cream, sweetener, cocoa/cinnamon until it is all frothy and thoroughly combined.
Pour about 1/4 of the batter into your heated and greased pan (assuming you're making a full batch. Leave it to cook for about 8-10 minutes!
3 minutes of cooking at medium-low


You can delicately check the edges every 3 minutes; look for the eggs firming up, browning edges, etc.
6 minutes of cooking at medium-low
8 minutes of cooking at medium-low.
Not much of a difference compared to 6 minutes, but the browning on the other side looks better 
A little blurry, sorry! This is the first side after ~9 minutes.
This was ideal for me.
Try to keep the cooking time to around 8 minutes for the first side. It is easy to overcook these. If you cook them for much longer than 8 minutes the outsides dry up too much and get too crispy, causing them to crack easily:
I got distracted. This is anywhere from 10-13 minutes.
See? The one that cooked longer is split (though still roll-able!).
After you've got one side of your crepecake to a good browning level, flip it and let the other side cook for 3-4 minutes. Remove from heat, dress it, and rinse/repeat with the rest of the batter.  

Get creative with your waffle crepecake toppings and enjoy! Try rolling bacon, a bit of peanut butter, and a bit of sugar-free syrup in your waffles. YUM! 
xo, Jennifer

Tuesday, 5 August 2014

Egg Waffles

A couple of breakfast things I really miss are pancakes and waffles. After plenty of consideration I have learned that it isn't the cakey parts I miss, but all the different toppings to put on them! I had to figure out something... I've tried various keto crepe recipes and particularly enjoyed ones with cream cheese. However, I didn't like making them. I always got frustrated at how easily they broke when I tried to do anything with them. I started experimenting and when I came up short I thought "why do I have to use flour or cheese?"...

Bust out your waffle makers, friends (alternatively, just make... crepecakes. Not thin enough to be a crepe but not thick enough to be a pancake). I've been making waffles like this for a long time now but I, again, never got around to posting it... until  now! This recipe is a wonderful semi-sweet breakfast treat to use as a base for a variety of toppings. Whipped cream. Fresh fruit. Peanut butter. Sugar-free jam or syrup... you get the idea. I usually opt for 1/2 a tablespoon of peanut butter and a tablespoon of sugar-free syrup. When the SO is feeling adventurous he opts for peanut butter, dark chocolate chips, sugar-free syrup, and a sprinkling of cinnamon.
Monday, August 4, 2014 
This morning breakfast consisted of chocolate egg waffles topped with some sugar-free syrup, accompanied by a side of reduced salt bacon (not because I am against salt. I just prefer my bacon less salty). Oh yeah, and freshly brewed coffee (1 tbsp hwc, 2 tsp of splenda, in a pretty sweet stein), a glass of water, and a multivitamin! I'm glad I decided to go back to early morning breakfasts, because I sure do feel productive today. All told, this special breakfast (everything included) was a little heavy on calories and carbs, but not so much that the rest of my day is ruined. Lunch will be a salad with chicken, and (ended up not eating lunch. drank water instead) tonight we're doing appetizers and a movie Fullmetal Alchemist for at-home date night. NICE.
BreakfastCaloriesCarbsFiberFatProtein
Egg Waffles, 2 serving(s)243602013
Maple Leaf Prime - Reduced Salt Bacon, 3 slices uncooked260102410
Mrs. Buttersworth - Sugar Free Syrup, 1/8 cup (60mL)104000
Foldgers - Coffee, 8 oz.00000
Splenda (Canada) - Granulated Sugar Substitute, 2 tsp01000
Neilson - Cream, Whipping, 35%, 15 ml (1 tbsp)501050
Totals5631304923
Chocolate egg waffles with two tablespoons of sugar-free syrup and a side of bacon.
These were a little softer than I normally make them (you can tell by the edges)
---

Servings: 4 servings (my waffle maker makes two large waffles, which I consider to be two servings each)

Time: 10-15 minutes

Nutritional info (per 1 serving): 122 cals, 3g net carbs (3g carbs, 0g fiber), 10g fat, 7g protein

Ingredients
  • 4 large eggs
  • 4 tbsp of heavy whipping cream
  • 2-4 tbsp of sweetener (depending on how sweet you want them. I usually use 2 tbsp)
  • 1-2 tbsp cocoa powder or 1/2-1 tbsp cinnamon [optional]
Tools
  • electric whisk or stand mixer (I use a Cuisinart electric stick blender/whisk)
  • a mixing bowl
  • a waffle maker or a small frying pan (for crepecakes)
Directions
Preheat and grease your waffle maker. Beat/whisk eggs, cream, sweetener, cocoa/cinnamon until it is all frothy and thoroughly combined.
Whisk those eggs!
I make my waffles in layers. I do one layer as pictured below and let it cook for a few minutes, then add another layer. Don't let the first layer cook to dry and crisp, you want the next layer to bind to the previous. 
First layer
Let your waffle maker cook these up until you are satisfied with them. The chocolate egg waffles (pictured at the beginning of the blog) were a little more moist than usual. The waffles pictured below are my preference; firm and crispy on the outside but soft and fluffy on the inside.
Get creative with your waffle toppings and enjoy! Try rolling bacon, a bit of peanut butter, and a bit of sugar-free syrup in your waffles. YUM! 
Plain egg waffles. Slightly crispy outside, fluffy and soft inside.
If you're looking to make crepes/pancakes instead of waffles, just heat up your frying pan and add some butter. Then poor a bit of the batter into the pan and cook as you would a pancake. Fair warning: the texture of this recipe as a pancake is much different than as a waffle. see this post: Egg Pancrepes/Crepecakes
xo, Jennifer

Saturday, 2 August 2014

Almond Crust

I use almond crust a lot in my dessert recipes (pies, dessert bars, etc.), so I'm posting up the recipe for easy reference in the future. This is a pretty versatile crust and could be used unsweetened for breakfast or dinner recipes. This recipe is enough for one 9 inch springform pan or pie plate, or a 9x5 inch brownie pan, for example.

Check out some of my recipes that use this crust: Peanut Butter Fudge Bars, Pumpkin Pie, Whipped Jell-O Pie, and Cheesecake Bars, to name a few.


Ingredients:

Almond Crust

  • 1 cup almond flour/ground almonds
  • 1/4 cup granulated sweetener (I use Splenda)
  • 4 tbsp unsalted butter, melted
Almond+ Crust

Sometimes I want a little more than almond in the crust, so here is a recipe to show how easy it is to change the make up of the crust.

  • 3/4 cup almond flour/ground almonds
  • 1/4 cup granulated sweetener (I use Splenda)
  • 4 tbsp unsalted butter, melted
  • 1/4 cup other filler (e.g: crushed pecans/walnuts/etc., unsweetened shredded coconut, flaxmeal, and so on)
Tools:

  • A fork and mixing bowl
  • A baking pan

Directions:
Melt the butter. Mix the dry ingredients and add butter. Spread your dough in whatever pan you're using (e.g. a springform pan, brownie tin, and so on).

You do not have to bake your crust before using it. Usually, if I plan on baking my entire dish for a lengthy period (e.g. pumpkin pie) I simply refrigerate the crust until I'm ready to use it. If the dish is not being baked (e.g. whipped jell-o pie), bake the crust. On t he other hand, I always bake the crust first if I'm baking cheesecake. If you decide to bake the crust, do it for about 10 minutes at 350F or until lightly browned. Regardless of whether you bake the crust or not, always cool it in the fridge for about 30 minutes before using it!


xo,
Jennifer

Thursday, 24 July 2014

Peanut Butter Fudge Bars

A long-ass time ago I went shopping in one of my favourite kitchen stores, Stokes, and saw an all-edges baking pan. Unfortunately, I have a difficult time justifying $20 for a pan, so I never bought it. This not-buying-what-I-want-when-I-want trend has hurt me, though. I saw a pair of beautiful, comfy flats (which I absolutely adored) for $35 but I couldn't get over the fact that I could get flats cheaper elsewhere. I wanted to wait for the price to come down, only to discover that all the stores carrying that shoe ran out of my size within a month. So much regret. I thought the same thing would happen with my pan! Recently, however, I went shopping with my wonderful mother and found that Stokes still had this item, and it was on sale! Of course, learning from my mistakes, I bought the damned thing.

It is truly a wonderful thing. A brownie pan with a "slicer" insert, and a detached bottom plate for easy removal. Bar all the treats? BAR ALL THE TREATS! I tried a new fudge recipe first, but it didn't turn out the way I had hoped. I knew I could get something wonderful out of this pan, though! I modified my almond pie crust and my peanut butter fudge to come up with a tasty, filling fudge bar.

Originally I wanted to call these breakfast bars, since they go wonderfully with coffee or tea, but I don't think they are breakfast-y enough for that; they are more of a dessert.

Go, get yourself a wonderful all-edges brownie pan and let loose your creativity! Or don't. You can just use a regular brownie pan. But you'll be missing out.

What's that in the background? Hmm...

P.S. I'm going to make this recipe again tomorrow so I'll update with more pictures. Originally I wasn't going to even post this but I loved it too much.

Servings: 18 pieces
Nutritional Information (per bar): 170 cals, 5g carbs, 2g fiber (3g net carbs), 15g fat, 6g protein
*Nutritional info includes the optional ingredients listed

Prep Time: 10 minutes
Cooking Time: 20 minutes
Cooling Time: 30 minutes for the crust, 1 hour minimum before eating the bars, best texture after over-night refrigeration. NOTE: You CAN eat them after an hour of cooling. We just found the texture to be better, and the bar firmer, the next morning.

Your Ingredients:


can't wait to make new labels
Crust
  • 3/4 cup ground almond/almond meal
  • 1/4 cup unsweetened, finely shredded coconut
  • 1/4 cup Splenda (or choice equivalent)
  • 1/4 cup unsalted butter, melted
Filling
  • 1/2 cup peanut butter (I used Kraft Whipped Peanut Butter)*
  • 2 tbsp virgin coconut oil
  • 1/4 cup unsalted butter, melted
  • 2 oz plain cream cheese, softened
  • 1/2 cup Splenda
  • 2 scoops vanilla or chocolate whey protein powder**
  • 1 tsp vanilla extract
  • (optional) 1/4 cup unsweetened, finely shredded coconut
  • (optional) 2 tbsp hemp seed hearts, or other seeds
Your Tools:

  • A kick-ass brownie pan
  • A saucepan & glass mixing bowl, or double boiler***
  • Some small microwavable mixing bowls
  • Fork and whisk, spatula etc

Notes:

* I have used Kraft Whipped Peanut Butter & Dip in previous recipes. I've been told that this is a tough ingredient to track down. Well, I only buy this kind of peanut butter! Just keep in mind that whatever peanut butter you use will likely change the nutritional values slightly.
** My scoop says 35g, so 70g of protein powder; about a cup. Unflavoured protein powder works as well.
*** I don't own a double boiler because they are usually pricey, and I can do the same thing with things I've already paid for. I typically use my small or medium sauce pan, depending on the size of the mixing bowl I use. You can use a stainless steel mixing bowl, but the glass ones I find never get quite as hot.

The Directions:
We're going to make the crust first. Preheat your oven to 300F. Prep your baking dish with butter/oil/etc. Melt butter. Combine all crust ingredients in a mixing bowl with a fork.

Press the almond mixture into the bottom of your pan. It'll look like you don't have enough dough at first, but you do. I promise. It may take some precision to get it to cover the whole pan.
Doesn't look like much, huh?
Ta-da!
Pop your crust into the oven for ~10 minutes. Refrigerate your crust until it is completely cooled. 
Sorry for shadows!
Note: If you don't want a crust you can omit the above steps, or make the crust and mix it into the peanut butter fudge batter below, making a more crunchy, "granola" like bar. They're tasty, too!
If cream cheese is not softened, microwave on 30% power for 45 seconds. Melt butter, coconut oil, and peanut butter on the stove, on low-med, using your glass bowl & small pot (or a double boiler). Whisk occasionally.
Add softened cream cheese and whisk until smooth. Add vanilla extract and sweetener. Whisk until smooth again. Once blended, remove the glass bowl from heat (be careful!) and add protein powder, one scoop at a time. Mix with a fork, and add seeds and coconut. Spread batter evenly in pan and bake for 5-8 minutes at 300F
Let cool for 5-10 minutes on the counter and refrigerate for at least one hour. Bars will be brittle, a little flaky probably. Overnight cooling in the fridge will make them hold together much better.
xo,
Jennifer

Monday, 7 July 2014

Breadless Breaded Pork Chops

Hi everyone! Sorry for the delay in recipes for the last week. Things got hectic at the university. We hosted a huge sociological conference for the first time. I was heavily involved in that, as I worked as the student advisor and I was able to present one of my papers (I'm an undergraduate so that's pretty awesome!).

Now I finally have a little bit of down time, but not for long. So here is a quick recipe that we seriously enjoy in this household. We used to love all those shake-n-bake recipes, and chicken fingers and whatnot. Of course, I had to come up with something a little healthier. Breadless breaded pork chops :). This recipe is not particularly unique, and rather quite simple. There are countless low-carb breaded meat recipes out there but this is what I make in my kitchen.


Servings: 4

Prep Time: 20 minutes
Cooking Time: 30-45 minutes

Your Ingredients:

  • 8 small pork chops, cut of your choice (I am using boneless loin chops)
  • 1/4 cup parmesan cheese, finely grated (I used pre-grated Kraft)
  • 1/4 cup unsweetened coconut, finely shredded
  • 1/4 cup ground almonds
  • 2-3 eggs
  • choice spices

Your Tools:

  • Two mixing bowls & whisks/forks
  • One large baking sheet or pan 

The Directions:

Preheat your oven to 350F. Mix all your dry ingredients in one bowl. Beat eggs in a separate bowl. Note: You may need more mix and/or eggs depending on how much you use. Sometimes I use it all quickly, sometimes I don't use it all. 
Dip a chop in the beaten eggs and allow any excess to drip off. Dip, roll, or pat your chops in the dry mixture. I find dropping them in, patting, flipping, and patting again works best. Repeat these two steps for all the chops. 
Repeat the above steps again, for all the chops, until you are out of mixture or they are thoroughly coated. I suggest doing it like this, with only one round per chop until each has the same number of dipping and coating, so that you don't run out of supplies too soon.
Prep your baking dish however you like. I used foil very lightly oiled in this picture, but sometimes I don't bother with that.
Bake at 350F for 30-45 minutes, depending on how well done you like your chops and how brown you want the coating. I prefer to cook my chops for 45 minutes or longer, especially when breaded.
Enjoy!
xo,
Jennifer

Sunday, 15 June 2014

Dessert Rolls

Previous to this post I put up a feature ("CopyCat") of Elizabeth Nimphius's low-carb stromboli. This is a modified version of her dough recipe to be used for dessert rolls (think chocolate logs, rollups, pinwheels, etc). In this post I will focus on a cream cheese roll I made, but I will also show dark chocolate rolls.

I'd like to stress again how versatile Elizabeth's stromboli dough is, because I have many ideas bouncing around in my head about what to do with it!
Look at that dough! Hnnggg.
This one is a little bit blurry but you can still see how awesome it is :D!
Let's make some dessert rolls, people!

Servings: 12-18
Nutritional Information: again, I'm going to post the nutritional information later.

Prep Time: ~10 minutes
Cooking Time: ~15-20 minutes

Your Ingredients: 

Dough
  • 1/4 cup (4 tbsp) almond flour
  • 3 tbsp coconut flour
  • 2 tbsp unsalted butter, melted
  • 1 1/4 mozzarella cheese* 
  • 1/4 cup sugar equivalent (I used 1/4 cup of Splenda)
  • 1 whole egg
  • 1/2 tsp baking powder
  • 1 tsp vanilla
  • 1/4 tsp salt
* I have used pre-shredded and block cheese, both work. Also, Elizabeth's note from her blog: "Use 4 tbsp coconut flour OR omit the butter if you are using a higher fat cheese." 

Filling
You can get really creative with the fillings. Reduced sugar jams, peanut butter, pudding, etc. 
Cream Cheese (I used the same cream cheese icing I made for my pumpkin muffins).
  • 1/2 cup plain cream cheese, softened
  • 1/3 cup heavy cream 
  • 1/4 cup sugar equivalent (I used 1/4 Splenda)
  • 1 tsp vanilla
Dark Chocolate
  • 2 oz dark chocolate, chopped/broken/etc (I used Lindt 85%)
  • 2 tbsp butter
  • 2-4 tbsp sugar equivalent (I used Splenda. Taste as you go)
  • 1/4 tsp salt (omit salt if you use salted butter for the filling) 
Your Tools:
  • 2 microwavable mixing bowls, a fork, and your hands
  • Stand mixer (not an immersion blender!)
  • A rolling pin and parchment paper/silicone baking mats
  • A cookie sheet
  • A small sauce pan and a heat resistant glass bowl, or a double boiler
The Directions:

Step 1 -
I recommend making your filling before your dough, because we don't want the dough to cool too much while we make the filling.
Dark chocolate filling: If you're not using a double boiler, fill your small saucepan about 1/2 way with water. Place your heat-resistant glass bowl over the sauce pan (most glass mixing bowls are great for melting stuff and don't get absurdly hot). Heat on medium and add your butter. As soon as it starts to melt, lower the temp to low-medium. Add your sweetener and mix until it is combined nicely, then add pieces of dark chocolate. Once everything is mixed smoothly, set aside.
Cream cheese filling: If your cream cheese is cold, cut it up into tbsp sized pieces and microwave for 20 second intervals. It should start to melt and should respond to being poked etc. Add sweetener, heavy cream, and vanilla. Blend thoroughly, until it looks like: 
 Set your cream cheese filling aside until the dough is ready.
Step 2 -
Preheat your oven to 400F. Pop your butter in the microwave for about 30 seconds and set aside (longer if the butter is really f-ing cold).
Step 3 -
How you proceed here is important (we reviewed this with the stromboli!). Microwave the cheese for 2 minutes at 30% power. If you don't know how to change the power on your microwave you better figure it out! My microwave has a "power" button which I press after the cooking time, and then I press "3" (for 30).
Ok. Why is this important? I learned the hard way that if you cook at 100% power you overcook the cheese, making it incredibly difficult to work with later. There are some pictures in my stromboli post demonstrating the difficulty. 
Step 4 -
While the cheese is in the microwave, beat your egg, sweetener, and vanilla until slightly frothy.
Step 5 -
After pulling the cheese from the microwave, mix it around with your fork and get it all sticky and perfect. Add your flours, butter, and egg mixture. Continue to combine. I personally like working with my hands for this part because I find it mixes better by squeezing than by stirring/folding. 
Initial mixing with a fork. My cheese cooled down quickly :(
As pointed out by Elizabeth you will probably have to microwave your cheese again to make sure everything gets incorporated nicely. I have found that 5-10 seconds is not enough so I usually do 30 seconds at 30% power.
After melting a second time I typically break out a dough balling technique I learned while working at a pizza place. You can see the technique in this video. However, I wouldn't recommend being as aggressive with your cheese dough as the dude in the video is with his pizza dough.
Your dough should look similar to this before you roll it out.
(I actually mixed it a bit more after I took this shot)
Step 6 -
If your dough has cooled considerably,  make sure to microwave it for a short time again before you roll it out. Get two pieces of parchment paper (one for under and one on top of the dough) and form a rectangular shape out of your dough. Grab your rolling pin and roll it out! I didn't measure the thickness after rolling, but you should be able to make it thin but not so much it breaks as soon as you pick up a piece of it. 
Step 6 -
Once your dough is rolled out, cover it with the filling you prepared earlier. 
Next, gently roll the dough! Try not to press too hard or you'll squeeze most of the filling out. You will probably only use 1/2 or 2/3 of the cream cheese icing, which is fine. Save the rest for a drizzle!
Step 7 -
Cut your log of yumminess into 12 or 18 pieces; be gentle but firm when cutting otherwise you'll squish all the filling out. Use the sharpest knife you have. Arrange on a cookie sheet and bake for 13 minutes. 
Here I've marked 12 pieces, but you could easily get 18!


Step 8 -
My dark chocolate experiment. Messy but delicious. And yes, the uncut log was fully cooked!
Transfer your rolls onto a cooling rack and drizzle with the left over icing. You can use a piping bag, a baggie with the tip cut off, or a spoon.
Cool for a few minutes and eat one while it is still warm! They are good cool, too, but 10 seconds in the microwave makes them so freakin' good later.
xo,
Jennifer