Showing posts with label carb replacement. Show all posts

Sunday, 9 June 2013

Avocado & Chocolate Chip Cookies

Helllllllllllllo beautiful people. I have missed chocolate chip cookies. They are very nostalgic for me. My mum always made the best ones and my favourite time to eat them was immediately out of the oven, with a small glass of milk. While I no longer ask my mum for home made chocolate chip cookies, I now know how to make my own... and much healthier! (though, missing that mother's love element...).

I am sharing this recipe because 1) avocados are a new discovery for me, having never in my life tasted one until 2013, and 2) chocolate chip cookies. These taste incredibly like "regular" chocolate chip cookies! They don't bake hard, like store-bought cookies. They bake super soft and stay soft, and taste great dipped in hot tea or coffee. Even the dough is remarkably similar to any chocolate chip cookie dough I've tasted.

I have had 8 people taste-test these cookies, and two have called me to ask for a batch. My mother, though she does not like sweetener even slightly, approved of them (but doesn't want more because the after taste of sweetener is strong for her). She has, though, asked me for the recipe so that she might make them for my step-dad. My dad wants a whole batch to himself. My brother, his GF, and her sister all loved them. And of course... My BF wants all baked goods all the time.

Needless to say I am very confident in this recipe!

Oh I would also like to prepare less experienced avocado-ers. Avocado, when cooked/baked/generally hot, has a weird and odd aftertaste. If you eat a cookie fresh out of the oven (admit it, you also love doing this. I know I'm not the only one), you will notice this slight taste. Once the cookies cool, the aftertaste disappears, and you may proceed to consume.

Let's take a look...


This picture is pretty blurry... whoops :( Guess you'll have to take a bite of your own cookie to properly see the inside

Serving Size: 1 cookie, makes 24 cookies
Nutritional Information: 85 cals, 4g of carbs & 2g of fiber (2g net carbs), 8g of fat, 2g of protein 

Prep Time: 30-40 minutes
Cooking Time: 35 minutes

Your Ingredients:
  • ~100g* fresh avocado
  • 1/2 stick of unsalted** butter, room temperature
  • 1 whole large egg
  • 2 tsp of vanilla extract (pure or artificial)
  • 1 cup of granulated sweetener (I use Splenda)
  • 1 3/4 cups of almond flour/ground almond
  • 1/2 cup of coconut, finely shredded
  • 1/4 to 1/2 tsp of salt (depending on how much you like salt... Both taste fine to me)
  • 1 tsp of baking soda
  • 1 tsp of baking powder
  • 2 oz of chopped dark chocolate, 75% cocoa or higher (I use Lindt Ecuador. 2oz = ~6 squares)
*Remove the pit before weighing. The ones I buy tend to be pretty small, and one avocado without the pit is generally 80-110g. For this recipe I used 1 and 1/4 avocado because my first one was only 74g. If your avocado is only a few (i.e. 5g) above or below 100g, that is fine. Also, any breed of avocado will work.
**You can use salted butter. If you do, omit the salt required by the recipe.

Your Tools: 
  • Two medium mixing bowls
  • A hand or stand mixer
  • Cookie sheet & parchment paper
  • Knife & cutting board
  • measuring cups/spoons & kitchen scale etc etc...
The Directions:

Step 1 -
The first thing we're going to do is work on your avocado. I have some pictures to show you how to "peel" an avocado, or you could just scoop and scrape the avocado meat from the rind. 


For either method, the first step is to cut so it can be pulled apart. Start at the stem and cut long ways, to the bottom. Make sure to cut right to the pit.


Once cut, you should be able to twist apart the two halves (like we all USED to do with Oreos). This is easier the more ripe your avocado is.

Now you'll want to remove the pit. The pit is pretty soft so a good technique is to press a knife into it and lift/wiggle it out. If you don't want to risk slipping and cutting yourself, you can slip a spoon under the pit and try to pop it out that way.

At this point you can scoop the avocado flesh out of the rind. If you do this, make sure to also scrape all the darker green flesh from the rind and use it, as it is the best for you. I find that I make a big mess this way, so you could also...


... Peel your avocado :D. I prefer this method because my avocado pieces usually look really nice after. For this recipe it doesn't make a difference, but I'll show you anyway.

Basically, start by scoring the rind on the two halves of the avocado, long ways. I only put one score on each but you can do multiple to make peeling easier.


You should be able to use your fingers to separate the rind from the flesh. I typically can pull this off just by slipping my thumb under the corner and pushing back slowly (a spoon would also work).

While this method works for me 9/10 times, unfortunately...


I made a mess of the avocado and there is a lot of meat left on the rind :(...

Oh well. Like I said, it doesn't make a difference for this recipe.


Step 2 -
Okay, great. Now that the avocado is ready, put that with your butter in a medium mixing bowl. You can cut the butter into cubes or pats to help it blend a little easier. Mix these together until creamy.
What a deliciously creamy texture :D. and yes, I am baking without the kitchen light on. not because I want to save the planet, but because I just started having to pay for my own hydro...
Next, add the egg and vanilla. Mix thoroughly. Add the granulated sweetener gradually as you mix the other things.
Step 3 -
Okay now we add everything else... but not all at once! First, all the almond flour and 1/4 cup of coconut (that is half what this recipe calls for), as well as the salt (if using), baking soda, and baking powder. Mix these ingredients on low until everything is incorporated.
Next add the chopped chocolate chips and the other 1/4 cup of coconut. Mix these together with a spoon or spatula, not the mixer.
I have this wonderfully cheap flexible "cutting board". It isn't silicone or anything, but it is marvelous for chopping and pouring things with minimal mess!

Step 4 -
Okay, everything's mixed and ready to go, right? Wrong. Now we chill the dough. Okay we don't have to chill the dough, but I find that the cookies are easier to form and also bake better when the dough is cold. Skip chilling if you are as impatient as I often am. If you want to chill the cookie dough, just pop the whole bowl as-is into the fridge or freezer for about 20-30 minutes. Also preheat your oven to 325F
This is a great time to clean up the mess you made.
30 minutes is up? Not yet? Okay during the last minute or so, line your cookie sheet with parchment paper. There is no need to grease the paper, but if you feel better doing so, go right ahead. 
Make ball type shapes out of the cookie dough, and press them down gently. This recipe should make 24 cookies (or 23 if you ate the equivalent of 1 in raw cookie dough, as I did...). Also, these cookies don't "fall" or spread like "regular" cookies do, so if you only slightly press down the dough balls, your cookies will be very round. For flatter cookies, press flatter (obviously). Bake 12 cookies at a time for 17 minutes
This is the perfect time for you to take your cats outside for a quick frolic on the patio. Also to get pissed off that your cats don't respond to their name when they are outside (even though they do inside!). Also to get especially irritated when you try to bring them in, and one basically yells "JUST KIDDING" as he pretends to run inside, then proceeds to hop the neighbour's fence. Pfft. Leave him there... You have better things to do. Like assemble a vacuum. Or contemplate making another batch of cookies. Or a grocery list. Or a list of lists you should make.   

Step 5-
When the cookies are finished, move them to a wire cooling rack. Let cool. Consume. Enjoy. Or consume one while it is incredibly hot, curse about how hot it is, but enjoy how melty and soft it is. 
Finished Product
these were clearly pressed down more than the ones above
xo,
Jennifer

Sunday, 31 March 2013

Zucchini Lasagna

Happy Easter! The only interesting things I've done this weekend (other than a deliciously huge breakfast with family today) is bake, play Bioshock Infinite, and get a new phone. Yea, no school work for me this weekend... Not because I'm done it all. Just because, well. Because.

If you're doing low-carb but always loved pasta, or you're like me and you can't get over that taste explosion of a casserole, you might want to check out some recipe using alternative "noodles". Many veggies can be used in place of noodles. However some people worry about over-powering tastes and textures. And these people are right, some veggies just aren't for everyone! I make many "pasta" dishes (such as spaghetti, lasagna, and "hamburger helper" type dishes) using several different veggies in place of noodles. In the upcoming weeks I will post a few more. Here are some examples to get us started:

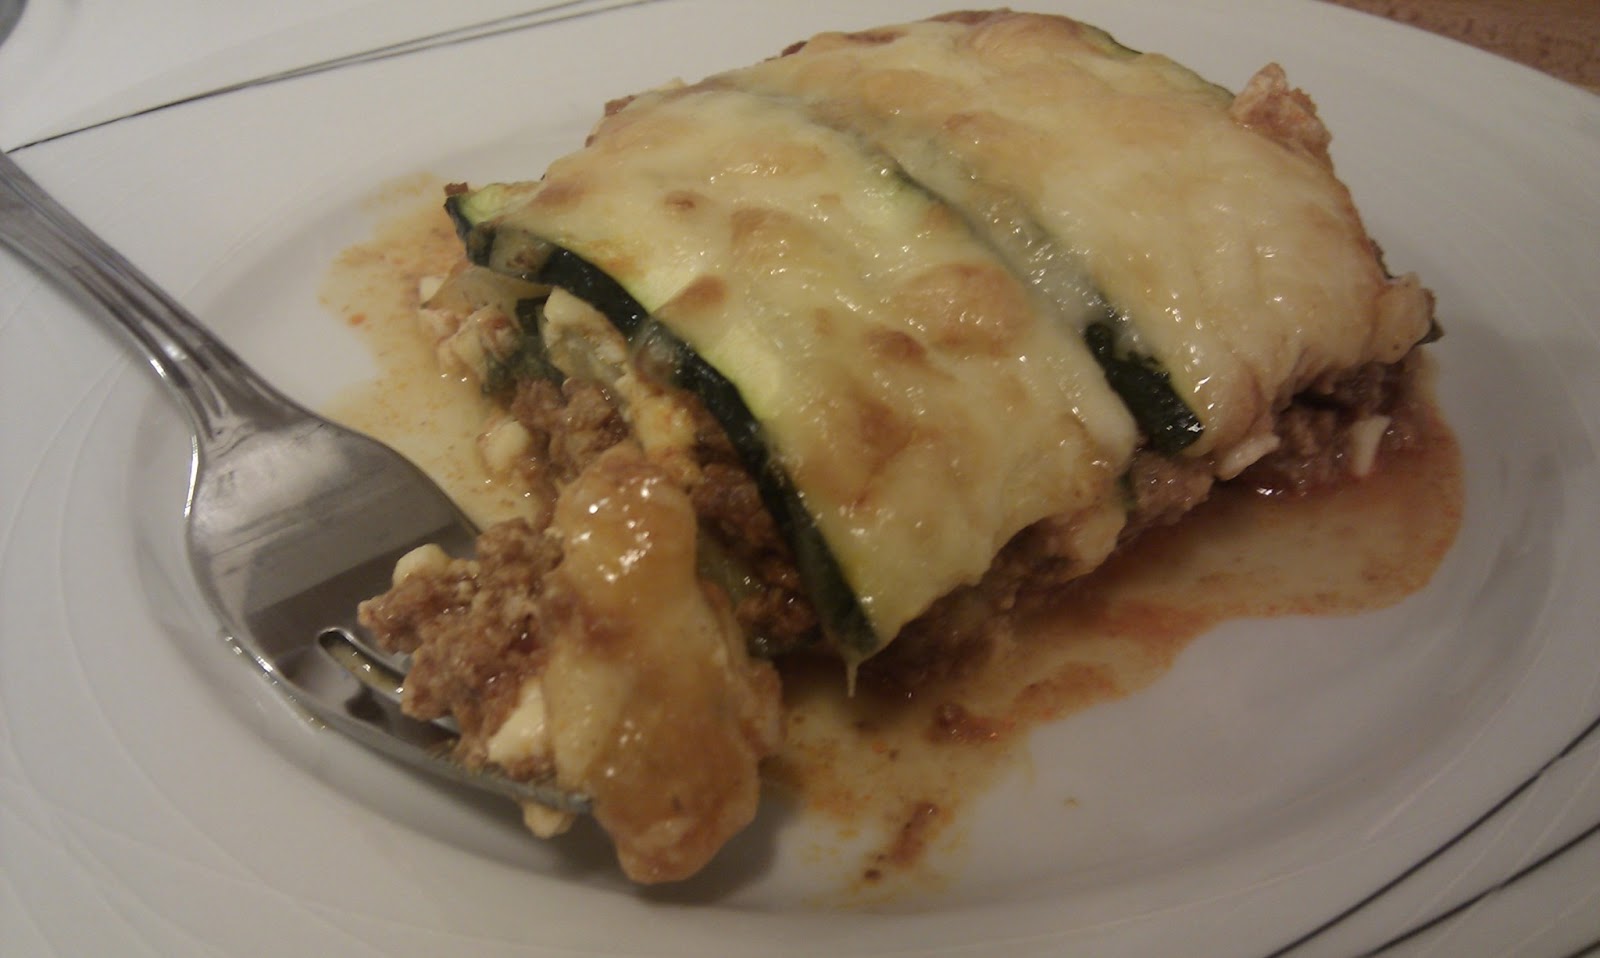
This pale and cheesy casserole features my favourite "noodle". Can you tell what it is just by looking at it?
Of course, another casserole. We love them in our house. There's only two of us so they  end up being meals for days! Lunch to go, and left over dinner. Mmm. 
Who doesn't love a savoury kitchen sink casserole?
As mentioned, casseroles are a great lasting meal. Fresh veggies aren't even necessary, especially for the kitchen sink casserole (I mean if you have some left over steamed broccoli, toss that in your casserole! Yum!). If you are on your own a 9x13 casserole can provide lunch and dinner for a week. If it happens to be 2 or 3 people, maybe dinner for a week. Since there is two of us, I like to freeze at least two-three servings (for those days when I really don't want to cook), and portion the rest into lunch containers.

The lasagna we're going to make today is another recipe that I have used tons of times but just never bothered to post. Well now I'll do that. In order to have a "pasta" meal, we need some kind of "noodle". So for this dish we use zucchini. I know this is not uncommonly done, but unless you are experienced with making alternative "pasta" dishes, you might think "ugh why zucchini?". Well it's nutritious for one (check out this link, or do a google search for more information on the health benefits of zucchini). It also has a very mild flavour, especially when paired with other flavourful things - the zucchini will not over-power the other things in your meal. You will notice, however, that zucchini doesn't have that chewy pasta texture. Which is great. More cheese, meat, and saucy flavours/textures!

Let's take a look at today's dinner...

Very cheesy, very filling, low-carb dinner


Servings: 12
Nutritional Information: 417 cals, 9g carbs & 2g fiber (7g net carbs), 26g fat, 34g protein

Prep Time: 20-40 minutes (~20 minutes just for zucchini)
Cooking Time: 45 minutes

Your Ingredients:

The "Pasta"
  • 4 medium zucchinis 
  • salt
The Cheese Layers
  • 2 cups of cottage cheese (I used small curd 4%m.f.)
  • 2 whole large eggs
  • 120g mozzarella cheese
  • 1/4 cup of parmesan cheese
  • choice seasoning
The Meaty Layers
  • 2lbs of ground beef* (I use medium)
  • 1 can of tomato paste
  • 1 cup choice pasta sauce (Original Ragu is what I generally use but other tomato sauces work)
  • choice spices (I use chilli powder, minced garlic, and some salt)
Your Tools:
  • Cutting board, and knife or mandoline slicer (e.g., this is the one I have)
  • Some paper towels
  • One medium-large mixing bowl
  • A pot big enough for 2lbs of ground beef & sauce
  • A 3 quart casserole dish (9x13 inches)
  • A wooden spoon or spatula, and a whisk
*If you don't want a lot of meat you can opt to use 1lb and still make a lasagna with the same dimensions. I've done this and it is still pretty filling. Nutritional values and instructions will be for 2lbs. 

The Directions:

Step 1 -
The first thing we need to do is deal with making a fauxpasta for our noodles. Cut the ends off all 4 zucchini. Slice (about 1/8th of an inch) each longways to make noodles. As listed under "Your Tools", a mandoline makes slicing much easier and the noodles more uniform. When finished, wipe each slice (both sides) with a paper towel to remove excess water.
Zucchini is a very watery squash. The water will present itself while cooking the zucchini. Unfortunately, our lasagna will be very runny... Unless we can get some of that moisture out! Let's do that. Put a sheet or two of paper towel on a flat surface (like your counter or another cutting board), sprinkle salt on it, then lay some slices of zucchini over the salted paper towel. Lightly salt the topside of the slices, and cover with another sheet or two of paper towel. Repeat this process until all your zucchini is salted. Put something heavy-ish (I have a pretty solid cutting board I use) on the pile.  

Step 2-5 -
While the zucchini sweats we can get started on the rest of the meal. You'll want to do these next few things at roughly the same time, so everything is ready when actually building the lasagna. First preheat your oven to 350F.
Put your ground beef in a medium sauce pan with about 2 tablespoons to 1/4 cup of water. Cook on medium heat.
Shred mozzarella cheese
While the beef cooks, whisk eggs in the mixing bowl. Add the cottage cheese and any seasoning you prefer. Add the parmesan cheese. Whisk together until blended and set aside. 
When the ground beef has browned, drain in a colander to remove fat and water. Put the drained beef back in the pot. Add seasoning and stir. Tomato paste and pasta sauce and stir. Heat on low-medium for a 2-4 minutes and then remove from heat.
Step 6 & however many layers... -
After 10-20 minutes remove paper towels and wipe excess water off the zucchini strips.
Line the bottom of your 3 quart casserole dish with some of the egg & cottage cheese mixture. We want 2-4 layers of cheese and meat so don't put it all in right away. Add some meatsauce, then some zucchini noodles. Make sure new sweat beads didn't form on your noodles before putting them in the casserole dish. Repeat this process until you run out of cheese and meat, or noodles. Top it all with the shredded mozzarella cheese.


Bake lasagna for 40 minutes. Broil for an additional 5-10 minutes. Remove from the oven and let it stand for 10-15 minutes before serving. Enjoy!
The Finished Product

As you can see, even after extracting some moisture, water still seeps out! There are other more involved methods (such as grilling or baking the slices before using them as noodles) you can try if you find your lasagna to be TOO watery. I find that the lasagna itself doesn't have a watery taste or texture and so I'm willing to deal with this result.
xo,
Jennifer


Sunday, 24 March 2013

[CopyCat] Egg Buns

What do you do if you have a bunch of lunch meat and you really want a sammich? You could slap that lunch meat between some cheese and nice green leafy lettuce (not iceberg lettuce, yuck). I mean that is pretty delicious with some mayo in there too. Or you could make my flaxbread recipe. 

But what if you want pulled pork? Or a cheeseburger? Or low-carb Sloppy Joe's? Aside from eating all the many delicious sandwich type things with a fork and/or knife (or with your bare hands like a boss), what do you do!?!?! Okay, okay. I know this isn't a crisis and there are many alternative breads and things you could try, or just not have them at all. But what I have here are light and fluffy egg buns!

BEFORE I CONTINUE: I did not create this recipe! I scoured the world wide web for freaking ever looking for a light, fluffy bread alternative. I found one. Please, please check out Fluffy Chix's Revolutionary Low-Carb buns. Now, I have not made the same recipe that Fluffy Chix provides which is why I am making this post. The recipe I've used is rather similar but missing a few ingredients (when I found this recipe I didn't have all those fancy ingredients, so I skipped them! No disrespect to FluffyChix for using such ingredients, or those of you who prefer to use her recipe.), so I like to think of this as a simpler contribution.

slow-cooked (12 hours) pulled pork on light and fluffy egg buns! And I spilled some baking powder on my counter which is why it is on top of this bun. Whoops.
Serving Size: 1 bun, makes ~12
Nutritional Information: 82 cals, 2g of carbs, 5g of fat, 9g of protein

Prep Time: 15-20 minutes
Cooking Time: 45 minutes

Your Ingredients:


  • 8 large eggs, separated*
  • 1/2 cup of cottage cheese (I used 4%m.f.)
  • 60g of mozzarella cheese (I used part skim)
  • 1/2 tsp garlic powder (or garlic salt if you prefer)
  • 1/2 tsp of onion powder
  • 1 tsp of baking powder
  • 1 scoop (~35g) of unflavoured whey protein powder 

Your Tools:

  • Two large glass or stainless steel mixing bowls (one for beaten egg whites, one for the final batter)
  • One small or medium mixing bowl (for dry ingredients)
  • A hand or stand mixer
  • A food processor or blender
  • A cheese grater
  • A spatula
  • Aluminum foil OR appropriately shaped baking molds/trays (e.g., muffin top tray)**
* Don't be intimidated, separating eggs is super easy! And sometimes even fun. For those of you who don't know how to do it, there are explanations/demonstrations below.
** Fluffy Chix recommends creating your own molds. I agree. Find something around your house that is the shape/size bun you want and make about 8-10 molds (for larger sandwich buns) or 12 (for smaller sized hamburger buns). I may or may not have cut my finger on the aluminum foil while making my molds, but I'm sure it is possible. Be careful!


The Directions:

Step 1 -
Preheat your oven to 350F. Grease aluminum molds or baking trays. 
Step 2 -
You will need all 8 eggs separated, so do that now. If you're not sure how to go about this, there are a few techniques you can try aside from using an egg separator. 

proof that I can do this method
  1. Drain the eggs: You can gently tap a whole in the top of the egg and slowly drain the whites out, but this will take a lot of time for 8 eggs.
  2. Use the egg shells: I use this method a lot. It can be messy but doesn't take too much time. Essentially you crack the egg around the middle as best you can, without dumping the whites & yolk out. Now "pass" the yolk between the two halves and the whites will start to fall off. 
  3. Use a water bottle: Make sure the water bottle is clean. Break eggs into a bowl, squeeze the water bottle and position the mouth of the bottle gently against a yolk. Release the pressure on the water bottle and it should suck the yolk up. You can put the yolk in another bowl by squeezing the bottle again. Click here for a silly demonstration of how to use this method
  4. Use your hands: This method is messy but effective. You can either crack the egg and dump it into your hand, letting the whites fall off, or you can crack all your eggs into a bowl and just fish them out.

As you can see, I did end up breaking one yolk (with the water bottle method). but it didn't break until AFTER it was separated! huzzah
Alright, now that your eggs are separated go ahead and get that mozzarella cheese grated too. Then, combine all dry ingredients in one of the small/medium bowls. 
Step 3 -
Process the cottage cheese until it looks like yogurt and put it in the bowl with the egg yolks. Put these ingredients, the grated cheese, and the dry ingredients, into your blender. Blend until it is kind of smooth (you'll probably have some mozza chunks still). Put the mixture back in the bowl and set aside.
Step 4 -
Grab your bowl of egg whites and hand or stand mixer, it is time to beat the egg whites to stiff peaks! Start out with a low speed and gradually increase to a medium, then high once the whites start to get foamy. Note: normally this would be when you add the cream of tartar as Fluffy Chix listed in her recipe, but I omitted this ingredient. The cream of tartar stabilizes the foam created with the egg whites but I have had no issues without it, which I attribute to the eggs still being pretty cool when I beat them (cold egg whites create a more stable foam, but room-temp egg whites get more volume). 
the egg whites are done once you can do this and not have them slide all over the place. we want "stiff peaks"!

Step 5 -
Put about a third of your egg whites into the yolk mixture and gently stir together to loosen your batter. Once the whites are incorporated, add another third of the whites and gently fold them in (folding is not like mixing or stirring! Please check out this link for instructions. Thanks, Youtube). Finally, add the rest of the egg whites and fold again.

Step 6 -
Divide your batter evenly among the aluminum molds or baking trays you're using. Put them in the oven and immediately drop the temperature to 325F. Bake for 45 minutes or so.
homemade hamburger bun molds, which may or may not have cut me.

it's a donut tray. two of these = one bun like pictured above
A couple times making this recipe I've noticed that the buns are still sort of moist once cut. If this happens you can toss them back in the oven (cut side up) for a few minutes, but you risk drying the outside too much. Alternatively I have left them out to air for a while before actually making dinner. The slight moistness is not noticeable once you top the buns with things, though, so it might be a non-issue for you.
Be sure to refrigerate your buns!
Finished Product


the ones on the left are from the donut tray

fluffy!

xo,
Jennifer

Sunday, 17 March 2013

Layered Chocolate & Peanut Butter Fudge

Hey beautiful people. Someone in ##loseit suggested demanded that I make layered fudge. So I bring you chocolate-peanut butter fudge. This should be it for fudge for a few weeks, too. There are other flavours I'd like to try my hand at eventually, though.

a delicious slab of layered chocolate and peanut butter fudge.


Serving Size: 1 piece, makes ~24 pieces
Nutritional Information: 79 cals, 3g of carbs & 1g of fiber (2g net carbs), 7g of fat, 3g of protein

Prep Time: 5-10 minutes
Cooking Time: 10-20 minutes
Cooling Time: 2+ hours

Your Ingredients:

Peanut Butter Fudge

  • 1/2 stick of unsalted butter
  • 1 cup of smooth or whipped peanut butter (I used Kraft Whipped Peanut Butter & Dip)
  • 2 oz of light cream cheese
  • choice sweetener (I used 1/2 cup of Splenda)
  • 1 scoop** of vanilla or chocolate whey protein powder
**When I made the peanut butter fudge for this layered fudge batch I only used 1 scoop of protein powder. The peanut butter fudge I posted a couple weeks ago used 2 scoops. Either will be fine. Nutritional values reflect ingredients actually listed.


  • 1/2 stick of unsalted butter
  • 4 oz of light cream cheese, softened
  • 1 scoop (1/3 cup, or 35g) of chocolate whey protein powder
  • 1/3 cup of unsweetened cocoa powder
  • choice sweetener (I used 1/2 cup of Splenda)
Topping

  • ~ 1 oz of dark chocolate (I use Lindt Ecuador 75% Dark)
Your Tools:

  • A 1 quart saucepan
  • A wooden or silicone spoon or spatula, or whisk
  • A ~9x5 glass casserole dish or 8.5x4.5x2.5 metal loaf pan
  • A freezer baggie 

The Directions:

As with the other batches of fudge, I'm lazy so I will copy and paste most of the directions.

Start with the chocolate fudge!


Step 1 -
Lightly grease whatever small baking dish you picked out. Or line it with parchment paper. Or both. I am going to go ahead and recommend that you use parchment paper. That way, the slab can be easily lifted from the dish.
Step 2 -
Cut your 1/2 stick of butter into smaller chunks or slices for easy melting.  Put your saucepan on low-medium heat and begin melting the butter.
Note: less heat is better. If you cook the fudge for too long, or on too high of a heat, the butter eventually cooks out of whatever you are trying to mix it with. You'll know this is happening when the chocolate pools in the middle of the pan, surrounded by a ring of butter. Make sure to stir often.
Step 3 -
Add the softened cream cheese to the butter mixture, stirring until all the cheese is melted. Once that is blended, add your sweetener and stir (again, I used 1/2 cup of Splenda). Next, add the protein powder and cocoa powder gradually as you stir
Step 4 -
Finally, once all ingredients have blended together, pour the 'batter' into your prepared dish. Put the chocolate fudge in the fridge and move on to the peanut butter portion!

Step 5 -
Cut your 1/2 stick of butter into smaller chunks or slices for easy melting.  Put your saucepan on low-medium heat and begin melting the butter. While the butter is melting go ahead and add a cup of peanut butter. Stir these two ingredients together while melting.
Step 6 -
Add your cream cheese to the melty pot and stir until melted. Add whatever sweetener you decided to use. I'll dump 1/2 cup of Splenda in there. Next, gradually add the whey powder
Step 7 -
Pour your peanut butter fudge 'batter' on top of the chocolate fudge you made a few minutes ago. 
Step 8 -
Put your dark chocolate in a freezer baggie and microwave it for ~15 seconds. Snip a tiny hole in the corner of the bottom of the bag. Drizzle the melted chocolate over top of the peanut butter. Refrigerate your fudge for 2 or more hours, then enjoy. Store the fudge in the fridge.
Finished Product


xo,
Jennifer

Sunday, 3 March 2013

Chocolate Fudge

There's going to be a lot of fudge happening over the next few weeks. Happy with my peanut butter fudge, I've been working out other flavours. I've done a layered recipe and I'm currently trying to work out a maple fudge recipe.

For now I bring you chocolate fudge. I have two slightly different recipes, both equally enjoyable. The first (with dark chocolate) is dense and heavy, and dryer than the other recipe. When I eat it all I can think is "this would go really well with a glass of milk."

Many of the ingredients as well as the process parallels my peanut butter fudge recipe.

Dense, rich, dark chocolate fudge
Serving Size: 1 piece, makes ~24 pieces
Nutritional Information (with dark chocolate): 37 cals, 1g of carbs and 1g of fiber (<1g net carbs), 3g of protein, 1g of fat
(without dark chocolate): 32 cals, 1g of carbs, 1g of fat, 3g of protein

Prep Time: 5 minutes
Cooking Time: ~10-15 minutes
Cooling Time: 1-2 hours

Your Ingredients:

With Dark Chocolate
  • 1/2 stick of unsalted butter
  • 3 oz of light cream cheese, softened
  • 1 oz of dark chocolate (I used Lindt Ecuador, 75%)*
  • 1 scoop (1/3 cup, or 35g) of chocolate whey protein powder
  • 1/4 cup of unsweetened cocoa powder
  • choice sweetener (I used 1/2 cup of Splenda)
  • cinnamon (optional)
* Chocolate varies a lot. I only use Lindt because it's easy to find and reliable. There is a 65% and 70% bar (Lindt Madagascar) with comparable carbs etc to the Ecuador one. So if you're using Lindt, I'd say anything above 60% would be good.

Without Dark Chocolate
  • 1/2 stick of unsalted butter 
  • 4 oz of light cream cheese, softened
  • 1 scoop (1/3 cup, or 35g) of chocolate whey protein powder
  • 1/4 cup of unsweetened cocoa powder
  • choice sweetener (I used 1/2 cup of Splenda)
  • cinnamon (optional)
Your Tools:
  • A 1 quart saucepan
  • A wooden or silicone spoon or spatula, or whisk
  • A ~9x5 glass casserole dish or 8.5x4.5x2.5 metal loaf pan
The Directions:

The directions are going to be pretty much the same as for the peanut butter fudge. So I'm going to copy and paste a lot.


Step 1 -
Lightly grease whatever small baking dish you picked out. Or line it with parchment paper. Or both. I am going to go ahead and recommend that you use parchment paper. That way, the slab can be easily lifted from the dish.
Step 2 -
Cut your 1/2 stick of butter into smaller chunks or slices for easy melting.  Put your saucepan on low-medium heat and begin melting the butter. While the butter is melting chop or break the dark chocolate (if you're using it). Add the pieces whenever. 
Note: less heat is better. If you cook the fudge for too long, or on too high of a heat, the butter eventually cooks out of whatever you are trying to mix it with. You'll know this is happening when the chocolate pools in the middle of the pan, surrounded by a ring of butter. Make sure to stir often.
Step 3 -
Add the softened cream cheese to the chocolate and butter mixture, stirring until all the cheese is melted. Once that is blended, add your sweetener and stir (again, I used 1/2 cup of Splenda). Next, add the protein powder and cocoa powder gradually as you stir

Step 4 -
Finally, once all ingredients have blended together, pour the 'batter' into your prepared dish. Let it cool for a few hours, then slice and enjoy.

Finished Product


xo,
Jennifer

Sunday, 24 February 2013

Peanut Butter Fudge

Heyyyyyyyyyyyy. Peanut butter! Fudge! Peanut butter fudge! It's delicious. Produce, consume, and enjoy.

Okay so I made this recipe a longggggg time ago without protein powder, and it was tasty... but a little too melty. I never posted the recipe because I was not pleased with the results enough to share. Now I am!

If you want super sweet fudge you should add more sweetener than I've listed in this recipe. Although most of my posts are of baked goods, I don't really enjoy super sweet baked things. I like things to be moderately sweet. I feel like this fudge is very rich and just sweet enough.

A side note: This entire recipe can be made by just microwaving the butter & cream and then stirring in the rest. I prefer the stove-top method because it allows for more control over heat and more even cooking.

Serving Size: 1 piece, makes 24 two-bite pieces
Nutritional Information: 74 cals, 3g of carbs & 1g of fiber (2g net carbs), 6g of fat, 3g of protien

Prep Time: 5 minutes
Cooking Time: ~10-15 minutes
Cooling Time: 1-2 hours

Your Ingredients:

  • 1/2 stick of unsalted butter
  • 1 cup of smooth or whipped peanut butter*
  • 2 oz of light cream cheese
  • choice sweetener (I used 1/2 cup of Splenda)
  • 2 scoops** of vanilla or chocolate whey protein powder***
  • cinnamon or cocoa (both of these are optional)
* I have used Kraft Whipped Peanut Butter & Dip in previous recipes. I've been told that this is a tough ingredient to track down. Well, I only buy this kind of peanut butter! Just keep in mind that whatever peanut butter you use will likely change the nutritional values slightly.
** ABOUT A DAMN CUP, STINGROO! My scoop says 35g guys so Stingroo wants me to emphasize that my scoop MIGHT NOT BE THE SAME as your scoop!!! By the way, 35g + 35g = 70g. You need 70g of protein powder.
*** I do not have vanilla protein powder... So obviously I used chocolate. It is delicious, I promise. You can't really taste the chocolate that much but who cares. Fudge. 
*** I have also discovered that unflavoured protein powder works as well.

Your Tools:

  • A 1 quart saucepan
  • A wooden or silicone spoon or spatula
  • Some kind of small baking dish. I've used a glass casserole dish that was ~9x5, and a metal loaf pan (8.5x4.5x2.5). I prefer the metal loaf pan.

The Directions:

Step 1 -
Preheat your oven to 350F. Just kidding. We're making fudge! Lightly grease whatever small baking dish you picked out. Or line it with parchment paper. Or both. 
Step 2 -
Cut your 1/2 stick of butter into smaller chunks or slices for easy melting.  Put your saucepan on low-medium heat and begin melting the butter. While the butter is melting go ahead and add a cup of nombutter. I mean peanut butter. Nom. Stir these two ingredients together while melting to create nombutter-butter!
Step 3 -
Ugh this part. Add your cream cheese to the melty pot and groan while you stir it. Complain loudly that cream cheese doesn't melt nearly as quickly or neatly as butter-things. Feel disgusted when the cream cheese starts to melt into chunks. Stir. Stir some more. Is the cream cheese melted yet? Keep stirring if not. 
Step 4 -
Okay, now that the cream cheese is deliciously blended with the nombutter-butter (YUM!) add whatever sweetener you decided to use. I'll dump 1/2 cup of Splenda in there. Stir this up until you're the only one who would be able to tell there was any sweetener in it, and only because you put it there.
Step 5 -
Now add the whey powder. I recommend not adding it all at once, but maybe about half a scoop at a time (then stir). But you can do whatever you want. Add it all at once. Or don't. 
Step 6 -
Pour your melty concoction into the baking dish you prepped earlier. Sprinkle some cinnamon or cocoa on top if you want. I sprinkled cinnamon-Splenda and omgyum.
Toss the fudge in the fridge for an hour or two. Cut and serve, or go at it with a fork. Store fudge in the fridge. Fudgeinfridge
Finshed Product

a slab after cooling in a metal loaf pan (lined with parchment paper)


xo,
Jennifer