If you've been following my blog for a long time you might remember that I posted two brownie recipes a long time ago. They were alright, chocolaty enough, but ultimately reminded me of a cake rather than a brownie. I ended up taking them down, unhappy with the results. Recently, however, my mum made some brownies which of course made me crave them and wish I had done follow-up recipes to my old brownie posts. Well... I didn't. Then Elizabeth over at Up Late Anyway posts this recipe and I knew immediately that I must try it.
One of the first things I thought while reading through that post was "SIX egg yolks?! What the crap am I going to do with the whites?". For recipes that call for egg whites I typically add the yolks to scrambled eggs, or pan fry them inside slices of avocado. I did not want egg white scrambled eggs, though. Wondering how long egg whites could last in my fridge, I fondly recalled my mum's lemon meringue pie, which she always made during Thanksgiving or Christmas. Mmm! It was helping her with those pies that taught me what the difference between a "soft peak" and a "stiff peak" is... mmm, lemon...

So, I bring you low-carb, gluten-free meringues a la ADIDAF. I'm going to try and include a lot of tips in this post for how to get your meringue just right, so pay attention!
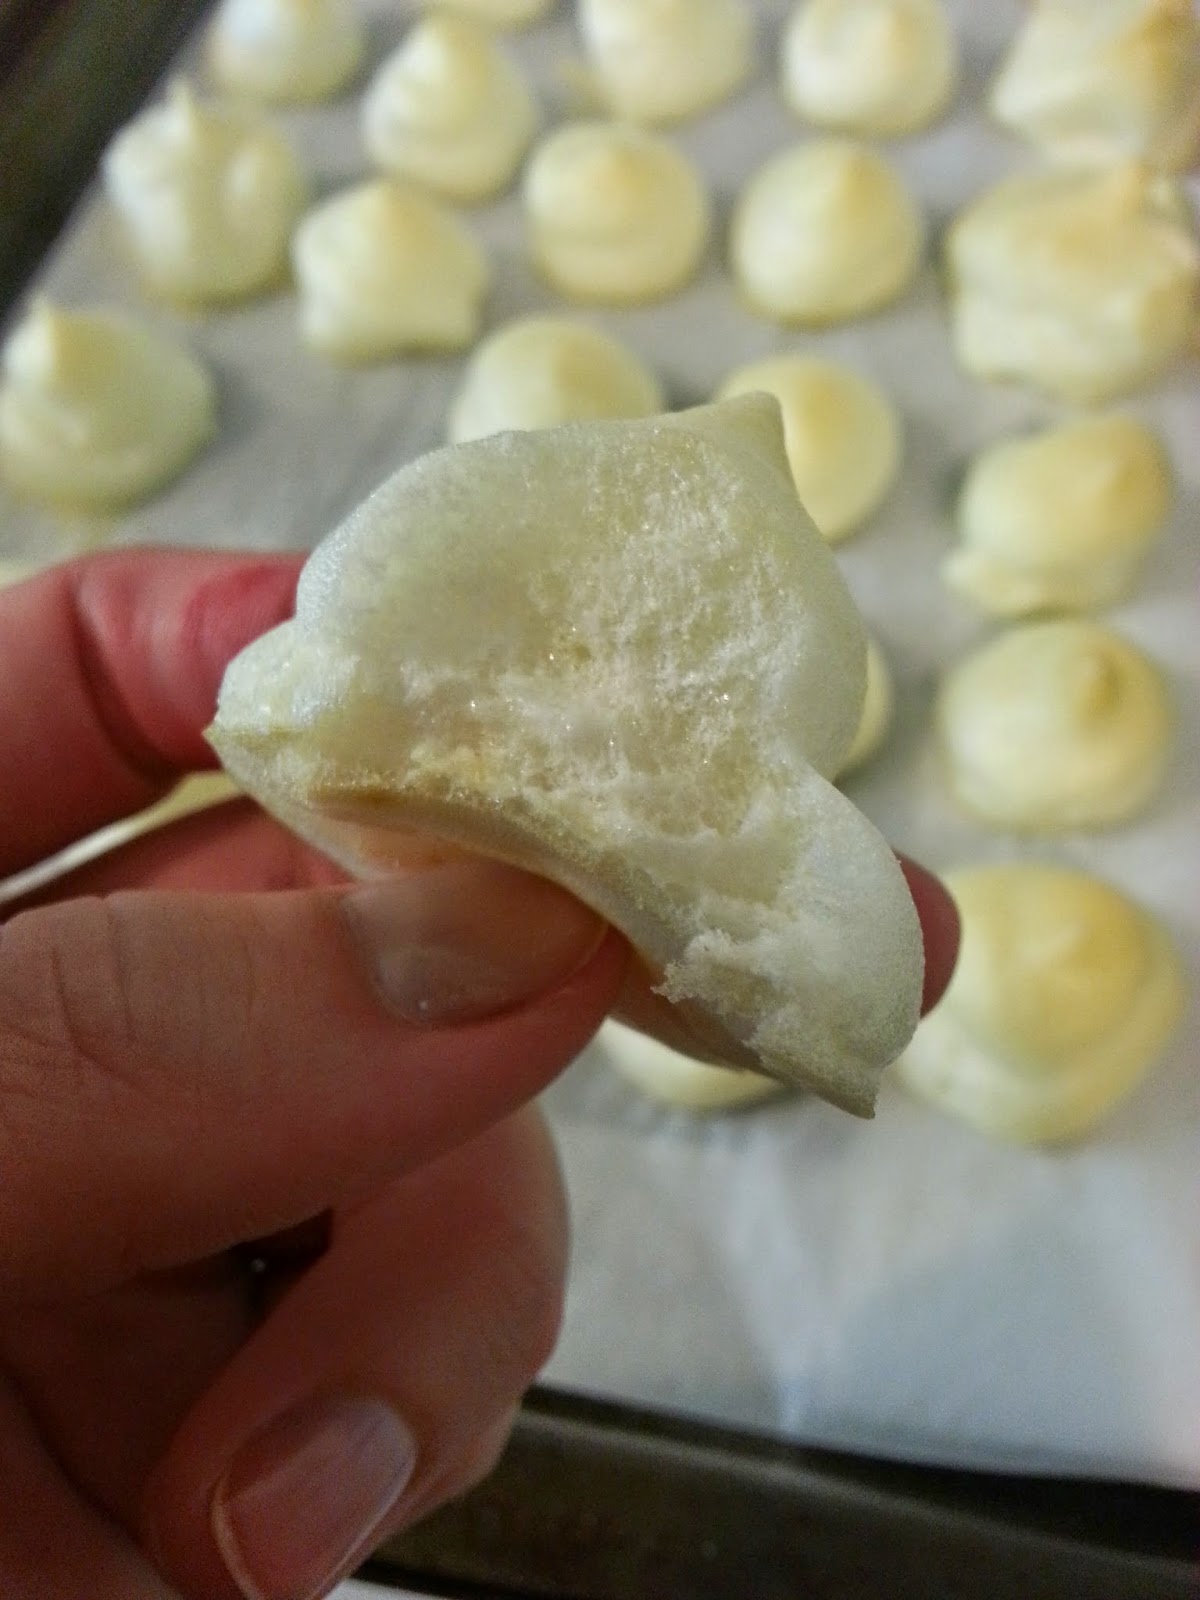
These treats are so light and airy, and have a similar taste to crispy marshmallows. When I eat one, all I can think of is roasting marshmallows over a fire until the outer edge is crispy, then pulling it off and eating it, only to roast the inside again. These are a must-try, especially if you've just made Up Late Anyway's brownies! It only makes sense, clearly.
 |
| Excuse the newspaper. My kitchen was undergoing a mini make-over :)! |
- 6 large egg whites, room temperature
- 1/2 cup granulated or powdered sweetener (I used granulated Splenda
)
- 1/2 tsp vanilla extract
- 1/4 tsp cream of tartar
- 1/8 tsp salt
- 1/2 - 1 oz extra dark chocolate
(optional)
Nutritional information, per serving (50): 2 cals, 0g net carbs (0g carbs, 0g fiber), 0g fat, 0g protein
Ingredients
|
Calories
|
Net Carbs (g)
|
Carbs (g)
|
Fiber (g)
|
Fat (g)
|
Protein (g)
|
|---|---|---|---|---|---|---|
6 egg whites
|
103
|
1
|
1
|
0
|
0
|
0
|
1/2 cup splenda
|
0
|
12
|
12
|
0
|
0
|
0
|
1/2 tsp vanilla extract
|
6
|
0
|
0
|
0
|
0
|
0
|
1/4 tsp cream of tartar
|
2
|
0
|
0
|
0
|
0
|
0
|
1/8 tsp salt
|
0
|
0
|
0
|
0
|
0
|
0
|
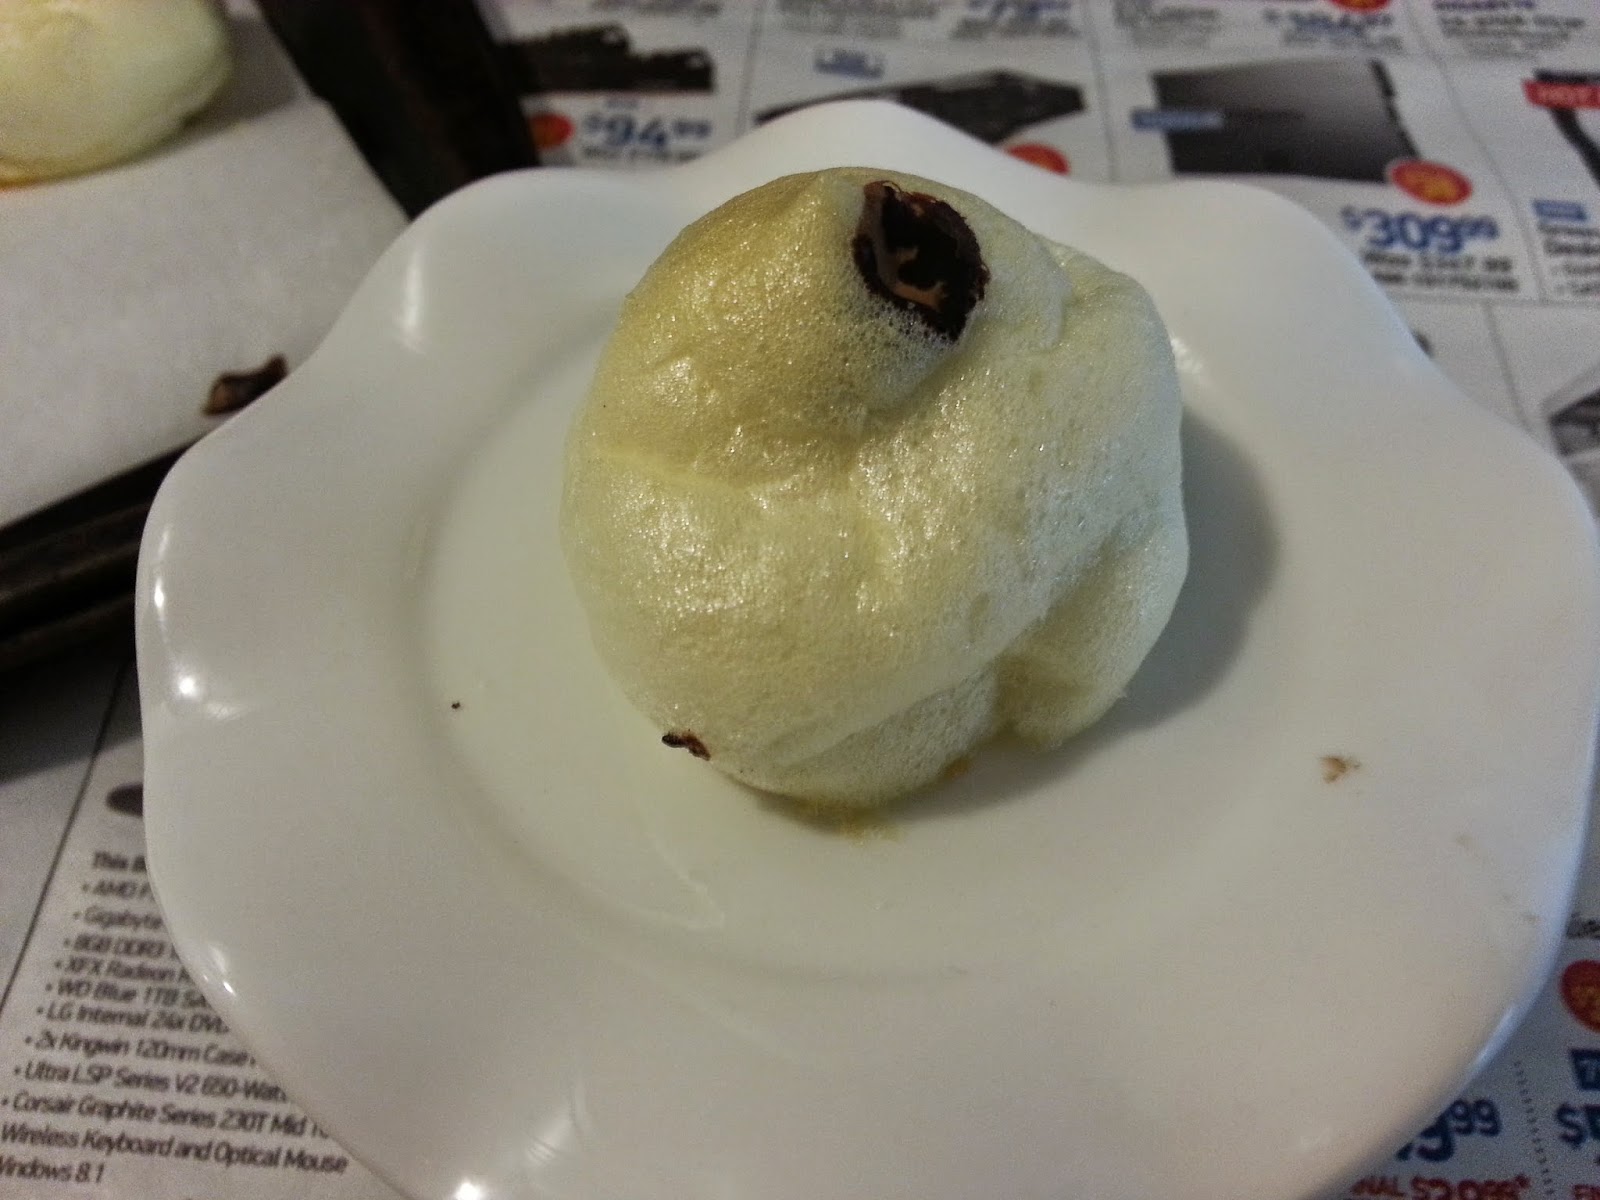
As pictured above, I drizzled some melted dark chocolate over my meringues... because why not? I also did something else with the chocolate. STAY TUNED!
| Optional Ingredients |
Calories
|
Net Carbs (g)
|
Carbs (g)
|
Fiber (g)
|
Fat (g)
|
Protein (g)
|
|---|---|---|---|---|---|---|
1 oz Lindt 85%
|
115
|
5
|
8
|
3
|
9
|
3
|
To properly create perfect meringue you need a particular set of tools. No exceptions. Note: all your tools must be thoroughly cleaned and dried. If they feel at all like there is any amount of grease present, wash them again. Egg whites do not like fat or other moisture.
First, separate your egg whites (6!) while the eggs are still cold - they separate easiest this way. Be careful with handling and do your best to not touch the egg whites while separating. If any amount of yolk ends up in the whites, be sure to remove it carefully before continuing (but not with your fingers!). Egg whites will not whip up properly if there is any fat present (including oils from your fingers, or leftover grease on a dish!).
Next, your egg whites should be at room temperature before you begin to work with them. This will allow your whites to whip faster and to a greater volume. While you wait for the egg whites to reach room temperature, preheat the oven to 250F and line two cookie sheets with parchment paper. Yes, you definitely need two.
When the eggs have reached room temperature, we'll beat them until they form firm peaks (in between soft and stiff):
- Soft peaks: Lifting the beater from the eggs, peaks form for only a couple seconds, then fall into themselves.
- Firm peaks: Lifting the beater from the eggs, peaks form with ridges, and only the tips fall back.
- Stiff peaks: Lifting the beater from the eggs, peaks form with obvious ridges and the tips remain upright.
Once you've formed soft peaks, begin to gradually add your powdered or granulated sweetener. For 6 whites I used 1/2 cup of sweetener. Many "real" meringue recipes suggest 1-2 tbsp of sugar (so, sweetener) for each egg white.
You'll also want to add 1/4 tsp of cream of tartar and 1/8 tsp of salt before you begin forming firm peaks. FYI: Cream of tartar is used as a stabilizer in a variety of tasty treats. For example, most (if not all) recipes using egg whites as their primary ingredient call for cream of tartar, as well as candies, and many types of frostings (including whipped cream).
Continue beating your eggs until they reach firm peaks (not stiff). When ready, spoon out your mixture onto the cookie sheets or use a piping bag. I made 50 bite-sized meringues, but you could easily make half that many larger. I began by spooning my eggs out but it felt tedious and I got pretty annoyed/impatient, so I switched to a piping bag.
My baking temperatures and times are a little different than the recipe on ADIDAF. Bake your meringues at 250F for 20 minutes, then 200F for another 20 minutes. At about the halfway mark I switched the positions of the cookie sheets because my top sheet was browning faster than the lower one. I prefer the look of lightly browned meringues, so I ended up adding about 10 minutes to the end of the bake.

Remove your meringues from the oven and pop one in your mouth, like, immediately. MMM! Read on if you want to know what to do with the chocolate...
 |
| I had eaten 5 by this point, and taken some to the SO at work... |
I melted 1 oz of Lindt 85% extra dark chocolate and drizzled it over most of my meringues. Break apart the chocolate, toss it in a baggie, and microwave for 10-15 second intervals until melted. Cut a tiny hole in the corner of the bag, and decorate away!
I also poked holes in a few with a meat thermometer (couldn't find anything else on the fly!) and squeezed chocolate into them. So when you bite down you get a soft, airy, marshmallow-y texture, and a chunk of dark chocolate!
Please enjoy!
xo, Jennifer


0 comments:
Post a Comment